Creating curved connector

Create straight connector as described in the section “Connecting elements”. Then double click the connector. Click “Insert Path point” to select Insert path point tool. Put control points with this tool on the connector. Hold ‘Option’ to add bezier control point (smooth curve). Press ‘Esc’ or click on the outside of the connector to turn off this tool.

help5.9

help6

help6.1

Another way is firstly create straight connector and then press Cmd+3 shortcut (Object – Connector – Smooth connector). One control point will be inserted in the middle of the connector. You can save smooth connector as default (Cmd+6).

curved1

Text Element

Text element is a transparent shape without borders.

help12.1.large

Adding text to the element

Double click element to show context menu. Click “Text Editor” button. You can also press short cut ‘t’ when shape is selected to open text editor.

help4

Input text in the text editor, adjust font, size, alignment and color of the text. Press Esc to close editor or click “Ok” button.

help5

There are the following options:

  • Top, bottom padding; Left, right padding.
    Paddings define the space between the element’s border and its content and set as percentage of height or width.
  • Autosize.
    If checked, element size changes from the minimum size to the size defined by the text.
  • Save text properties.
    Save text properties and apply them to new shapes.
  • Editor black background.
    Set black color for editor background. Convenient when font color is light.

Sticky Spots

Sticky Spots are points on the elements where connectors can be connected. There are Sticky Spots that belong to the element contour and free Sticky Spots that can placed at any point on the element.
Sticky Spots that belong to the element contour are created automatically when connector is created.
You can move, add and remove free Sticky Spots with Move Sticky Spots tool.

help14.1

To move Sticky Spots with connected connectors, select Move Sticky Spot Tool or press ‘s’ hotkey (press Esc to return Select tool). If you move the mouse cursor to the element, a circle appears and cursor has hand showing that you can move sticky spot under the mouse along element contour.

help3.5

sticky_spot1

In annotating images (for example, screenshots), it is convenient to put anchor points on the image and connect them with annotation labels. It’s important that anchor sticky spots move with image.

There are two ways to create a new Sticky Spot. The first way is to activate the Move Sticky Spot Tool and click to select the element you want to add the Sticky Spot to. Then, hold down the option/alt key. A “+” will appear. Click on the contour of an element where you want to create the Sticky Spot. The second way is to drop a connector end point onto an element which contains an image.

To remove an existing sticky spot, activate the Move Sticky Spot Tool and click to select the element you want to add the Sticky Spot to. Then, hold down the option/alt key. A “+” will appear, but when you move the mouse to an existing Sticky Spot, the “+” will change to a “-“. Click on the existing Sticky Spot to remove it.

help14.2.1 (1)

After moving an image annotation remains connected.

help14.2


Connecting elements

Double click element to show context menu. Select “Connector Tool”. You can also press short cut ‘c’ when shape is selected for starting a connection or use an arrow on the element.

help2

Drag connector line from the source element to the any point on target element. Last used or default connector will be created. This connector connects the centers of the elements. Connected objects stay connected unless you disconnect them.

connect1

You can click as many empty spots on the canvas as you like to give the connector bends. Double click to cancel connector creating.

connect2

Drag an endpoint of existing connector to another element until the sticky spot is highlighted, then drop it to re-attach connector.

connect3

Hold Shift after you start dragging connector to create horizontal or vertical connector that connects both sides.

help3.3

You can also connect two elements with one of the arrow elements from the Elements Palette. This arrows could stay unattached or have only one of its endpoint attached to element.

help3.4


Smart connectors

There is an additional component “Smart Connectors”. Smart Connectors provide advanced object-avoiding orthogonal and polyline connector routing. This component available as in-app purchase both for Mac App Store and non App Store version of the app. See menu Store inside the app.

Demo video:


New items in the connector menu will appear after purchase this option.

newitems

There are orthogonal and polyline modes.

orthogonal polyline

Routes are builded automatically but you can put checkpoints that connector must visit.

checkpoints

Vector drawing tools

There is an additional component “Vector Drawing Tools” that allows you to create your own shapes and lines and use them along with predefined shapes. In fact this is a vector drawing editor inside Diagrammix! This component available as in-app purchase both for Mac App Store and non App Store version of the app. See menu Store inside the app.

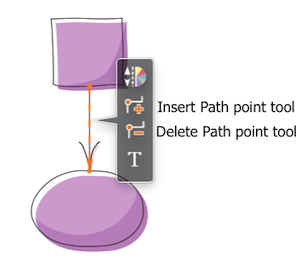
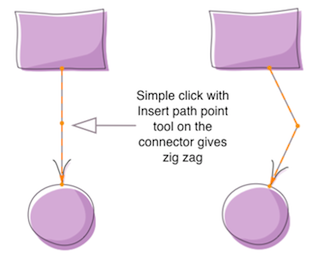
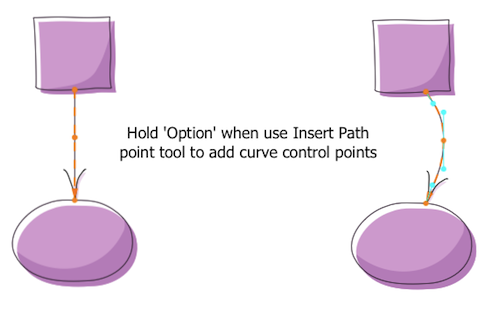
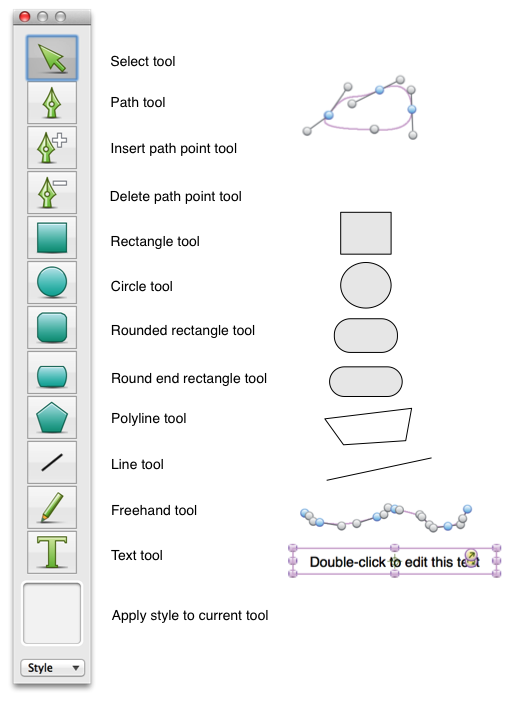
Here are all drawing tools with descriptions and samples

Tools

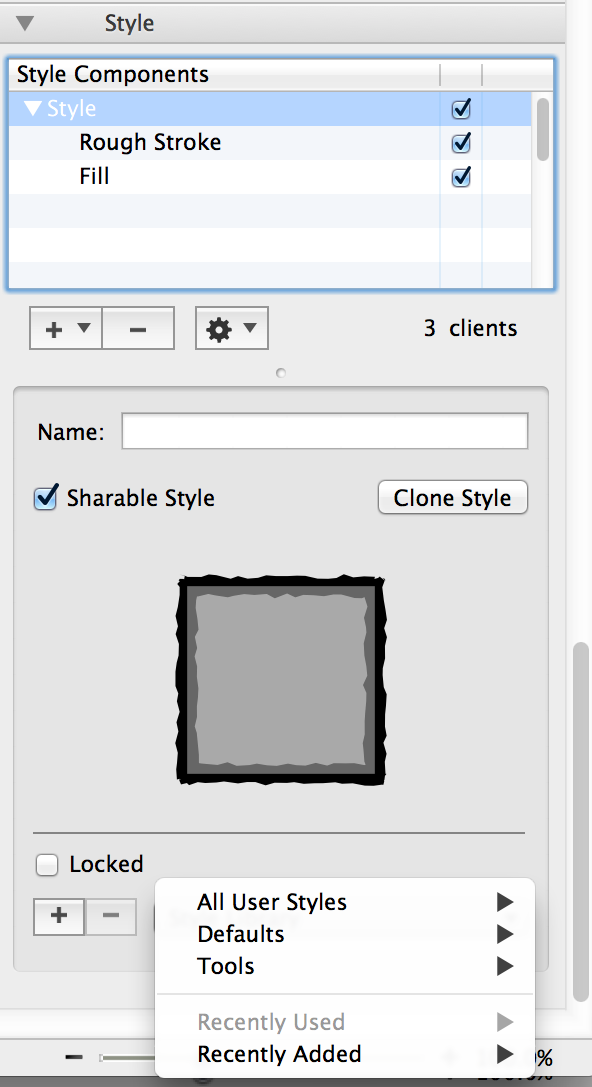
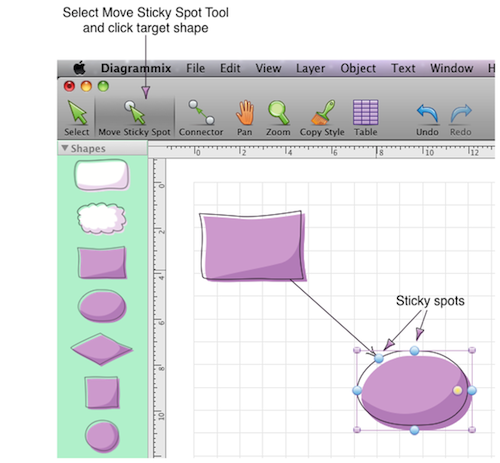
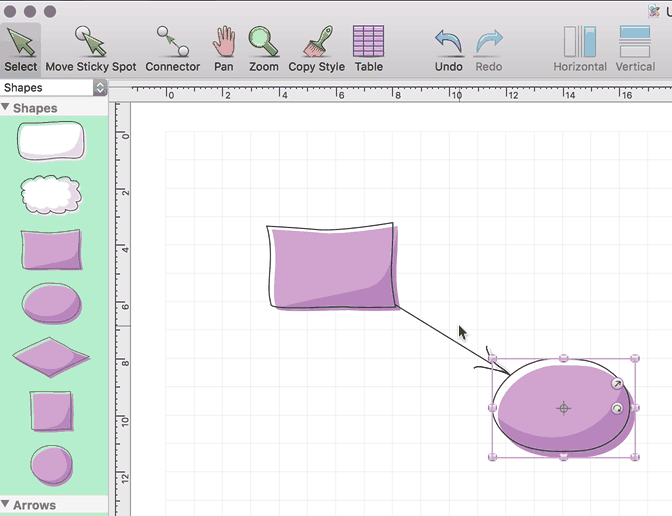
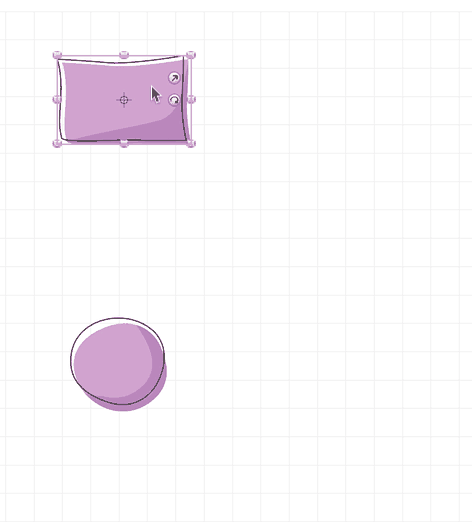
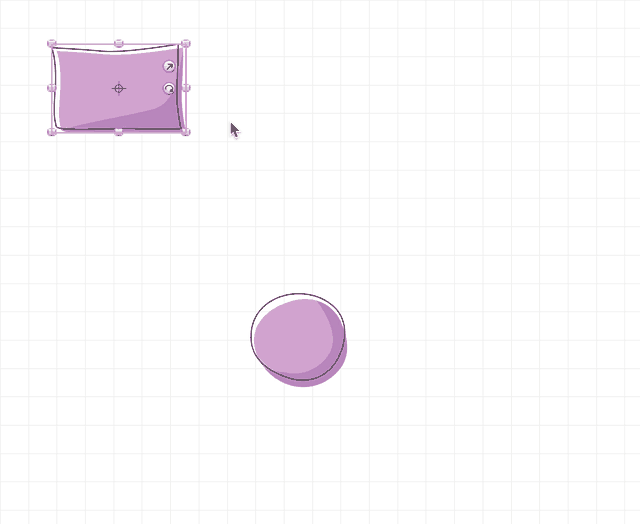
You can apply different styles to strokes, fills, different adornments, masks in Style Inspector

StyleInspector_large

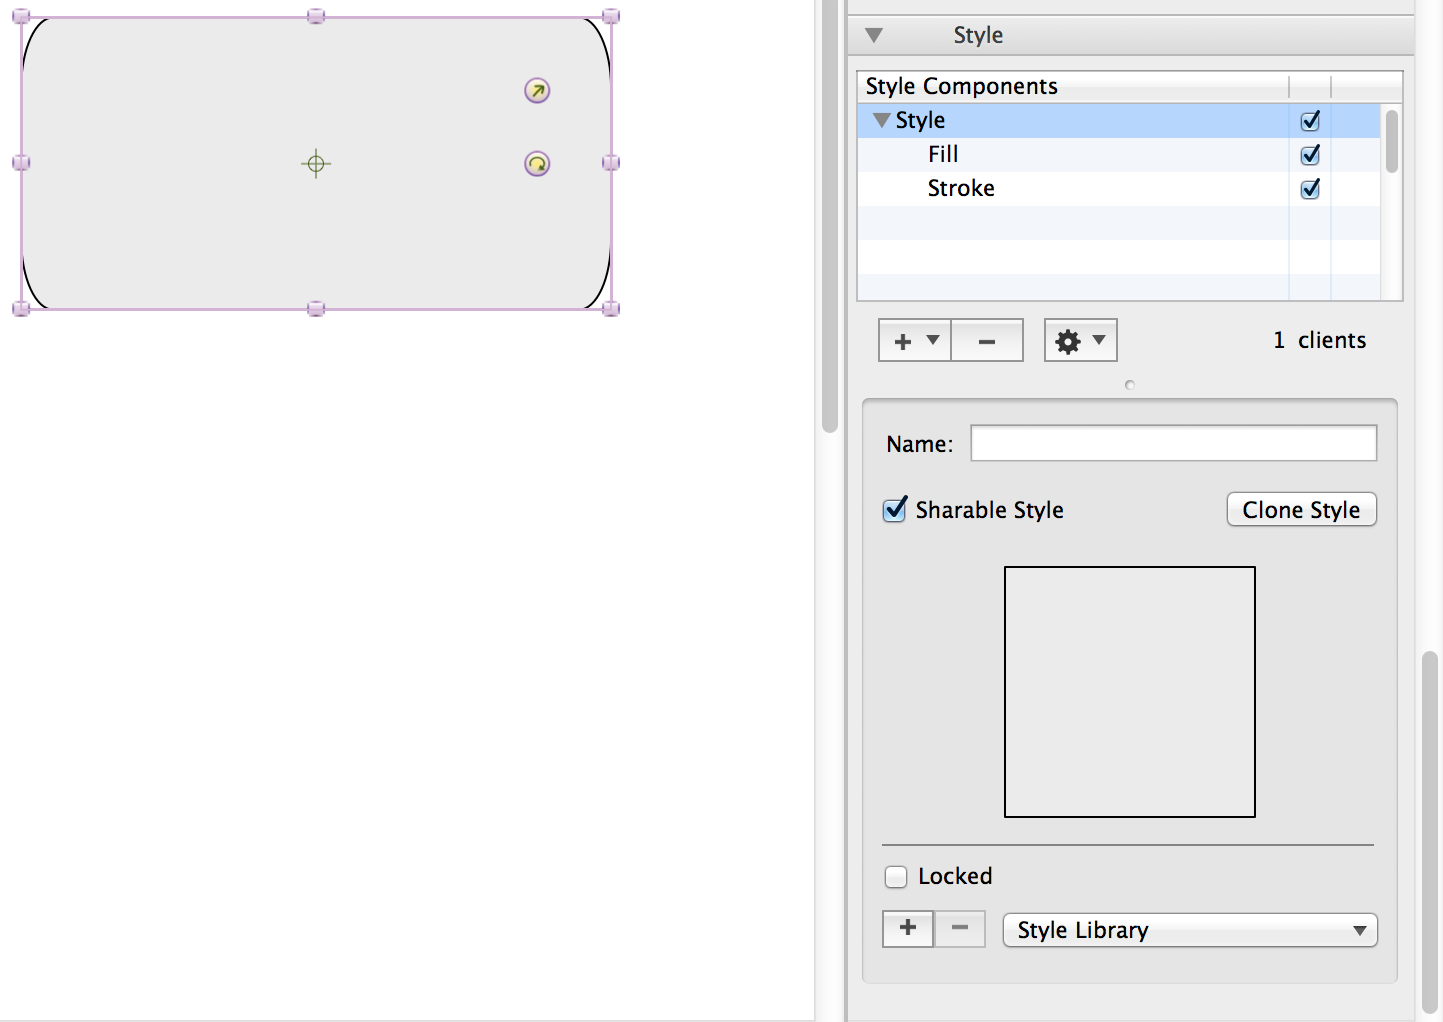
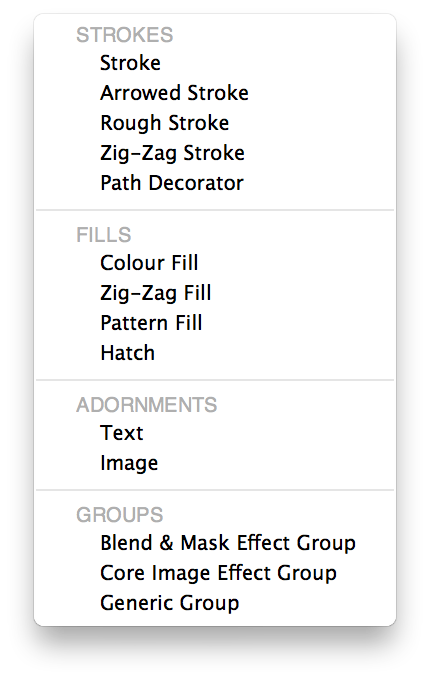
Different style components:

StyleComponents_large

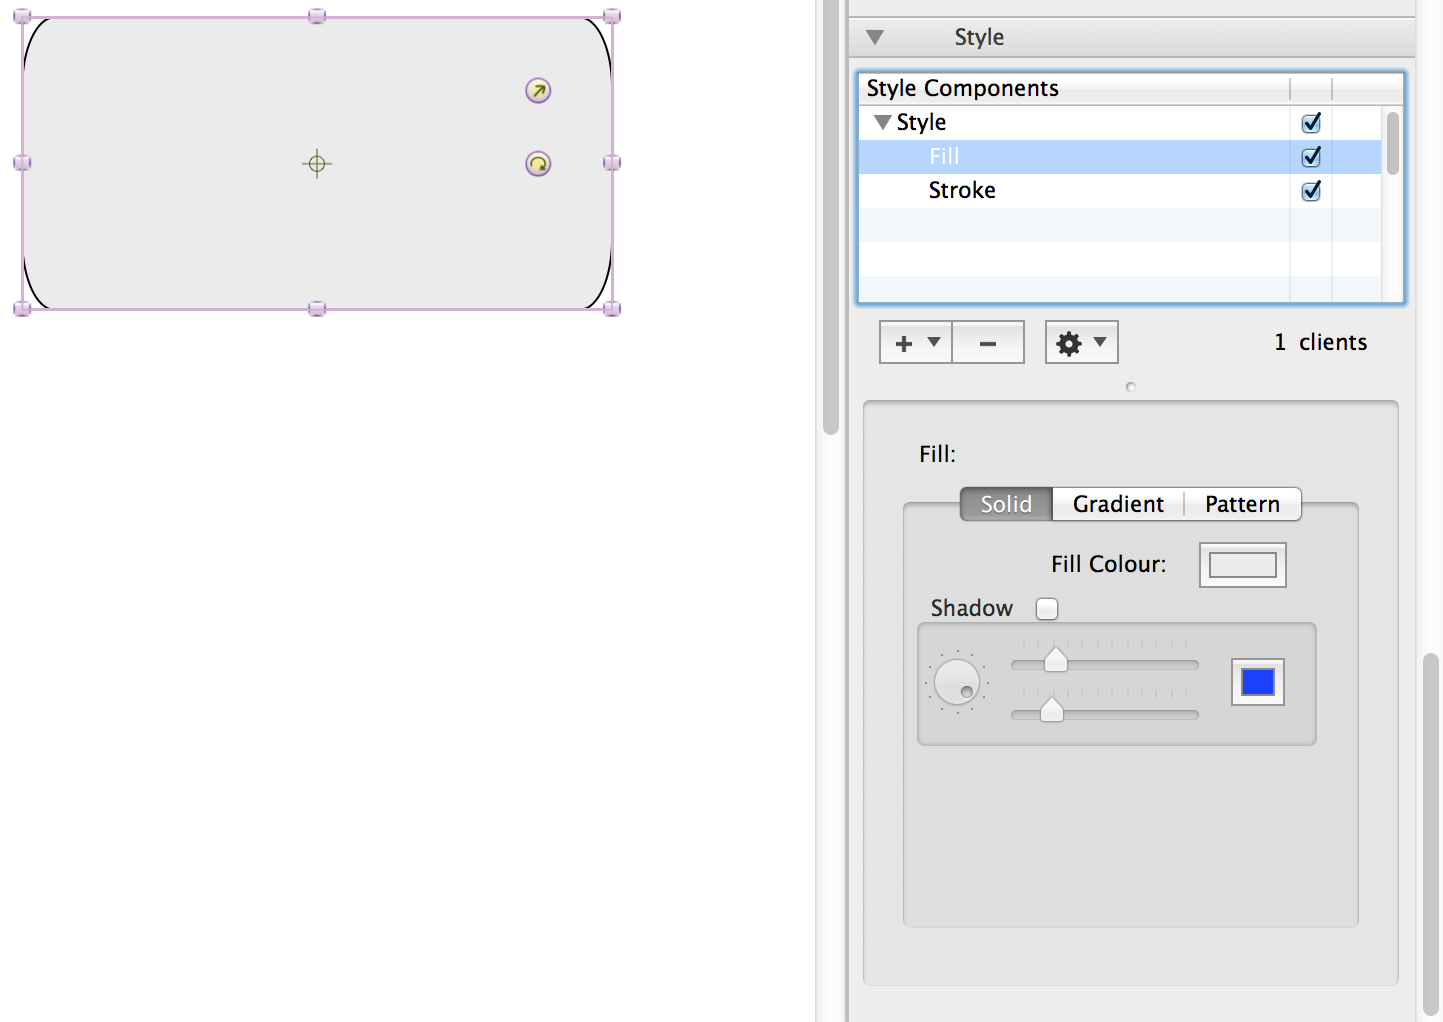
Fill component properties:

Fill_large

Stroke component properties:

Stroke_large

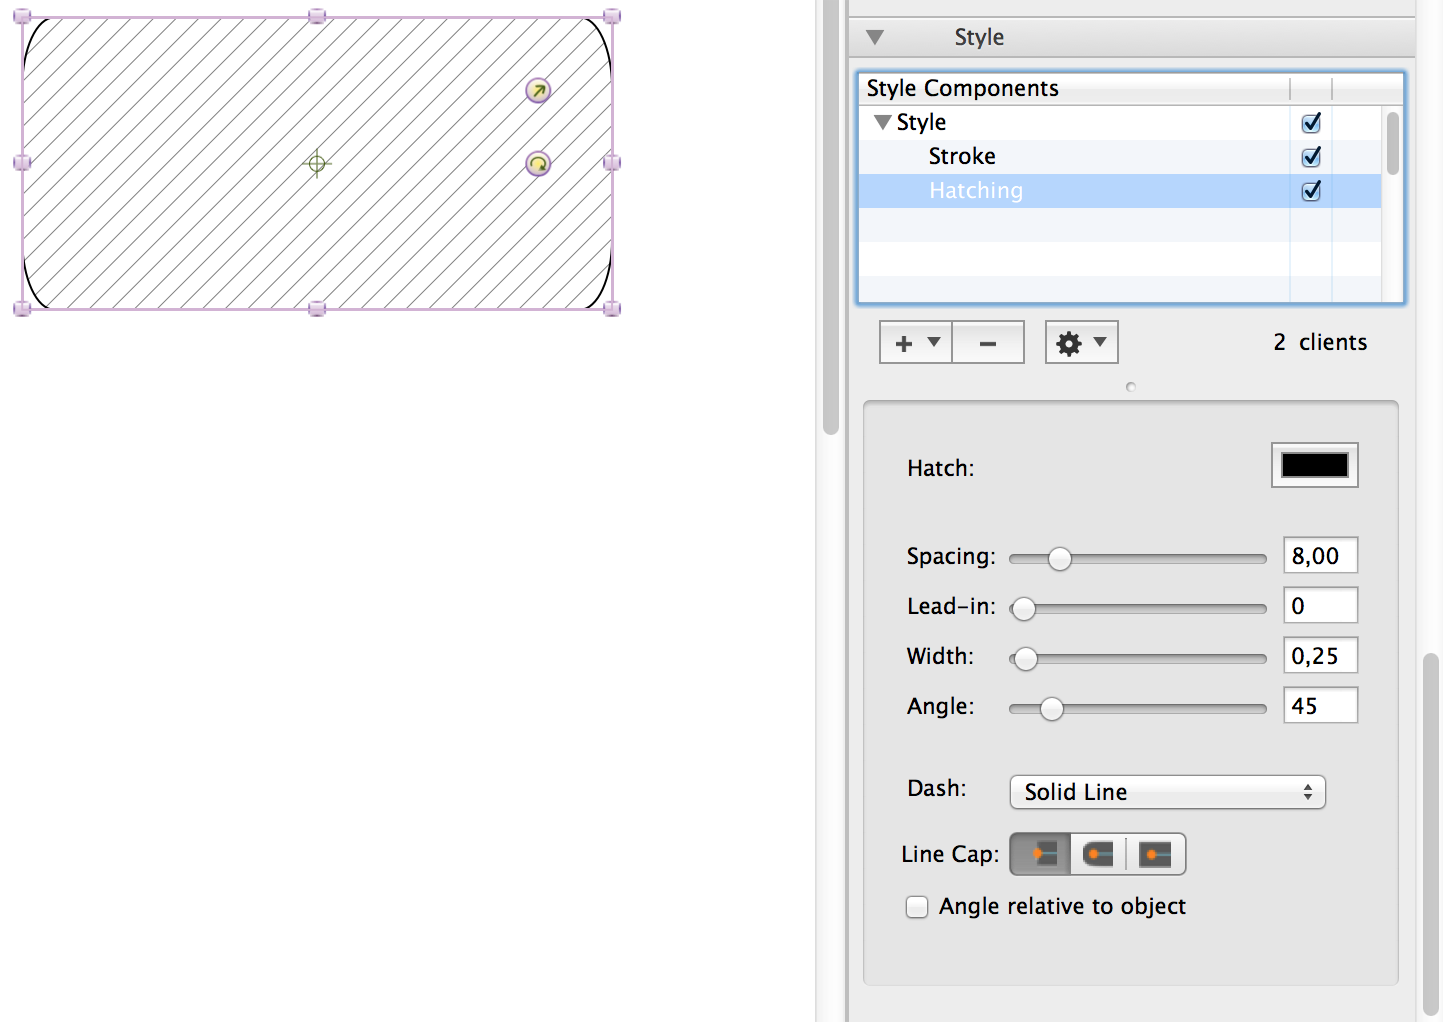
Hatch component properties:

Hatch_large

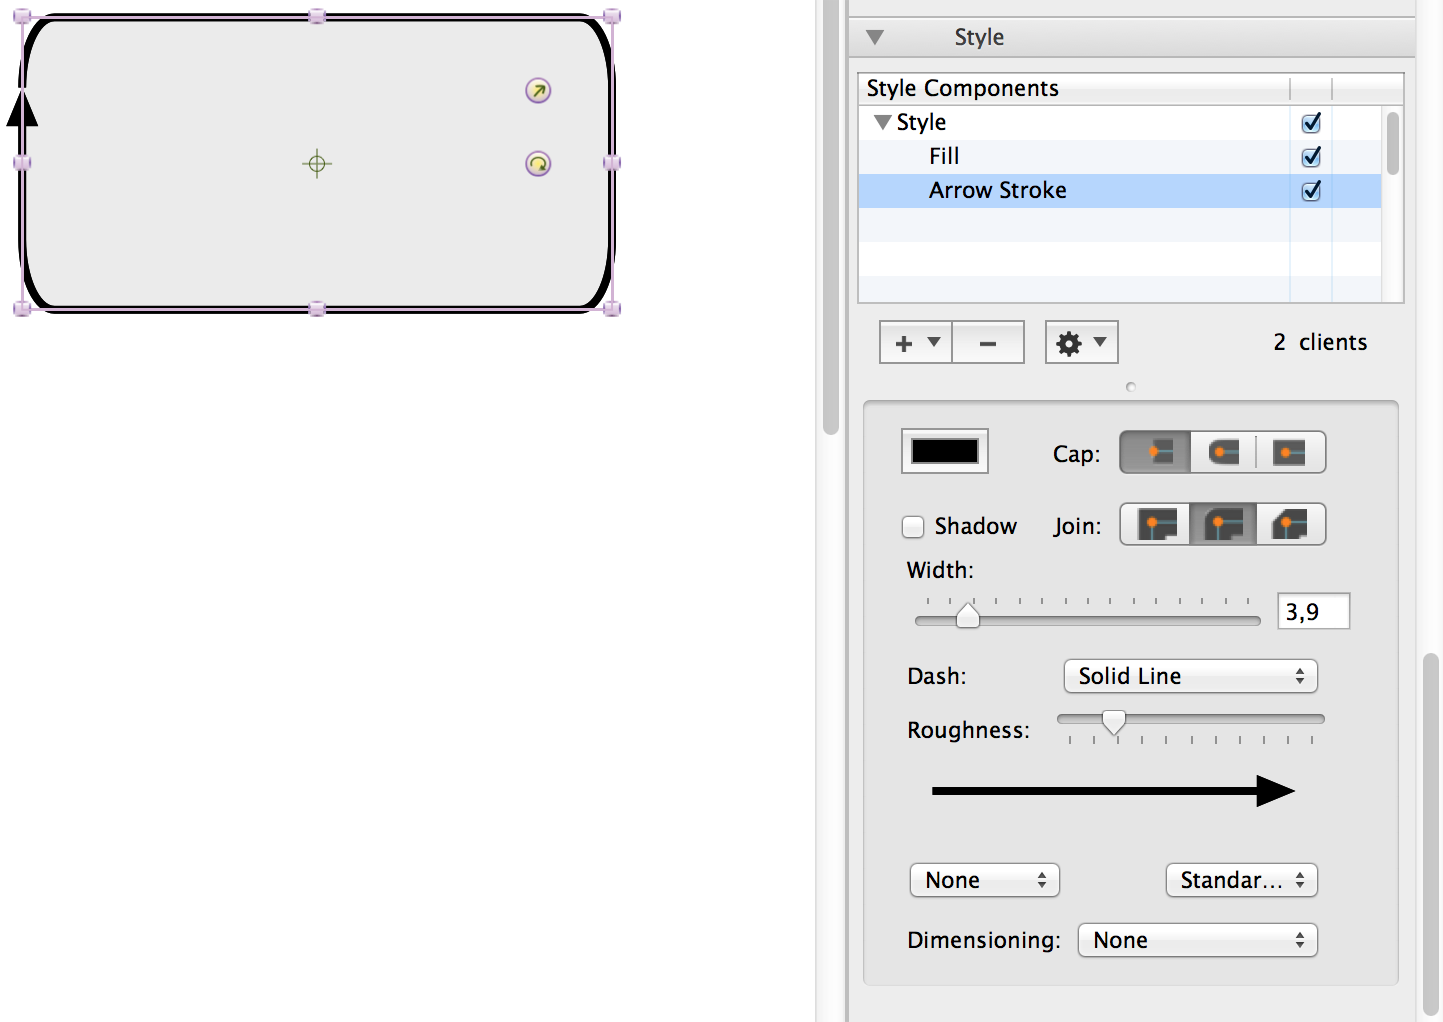
Arrowed stroke component properties:

ArrowedStroke_large

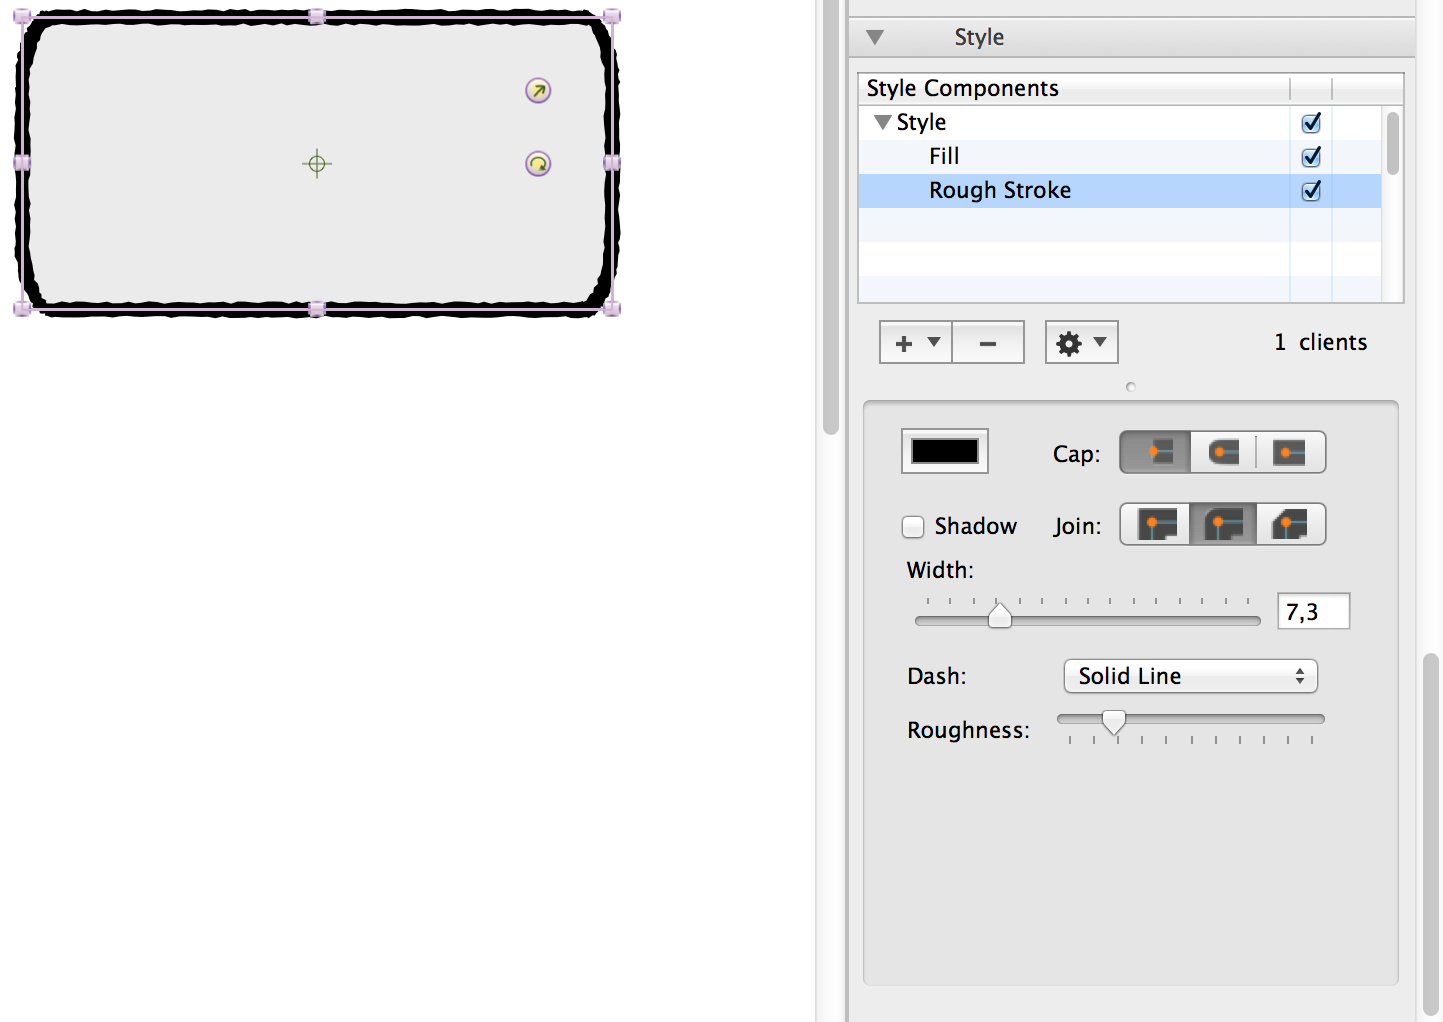
Rough stroke component properties:

Rough_large

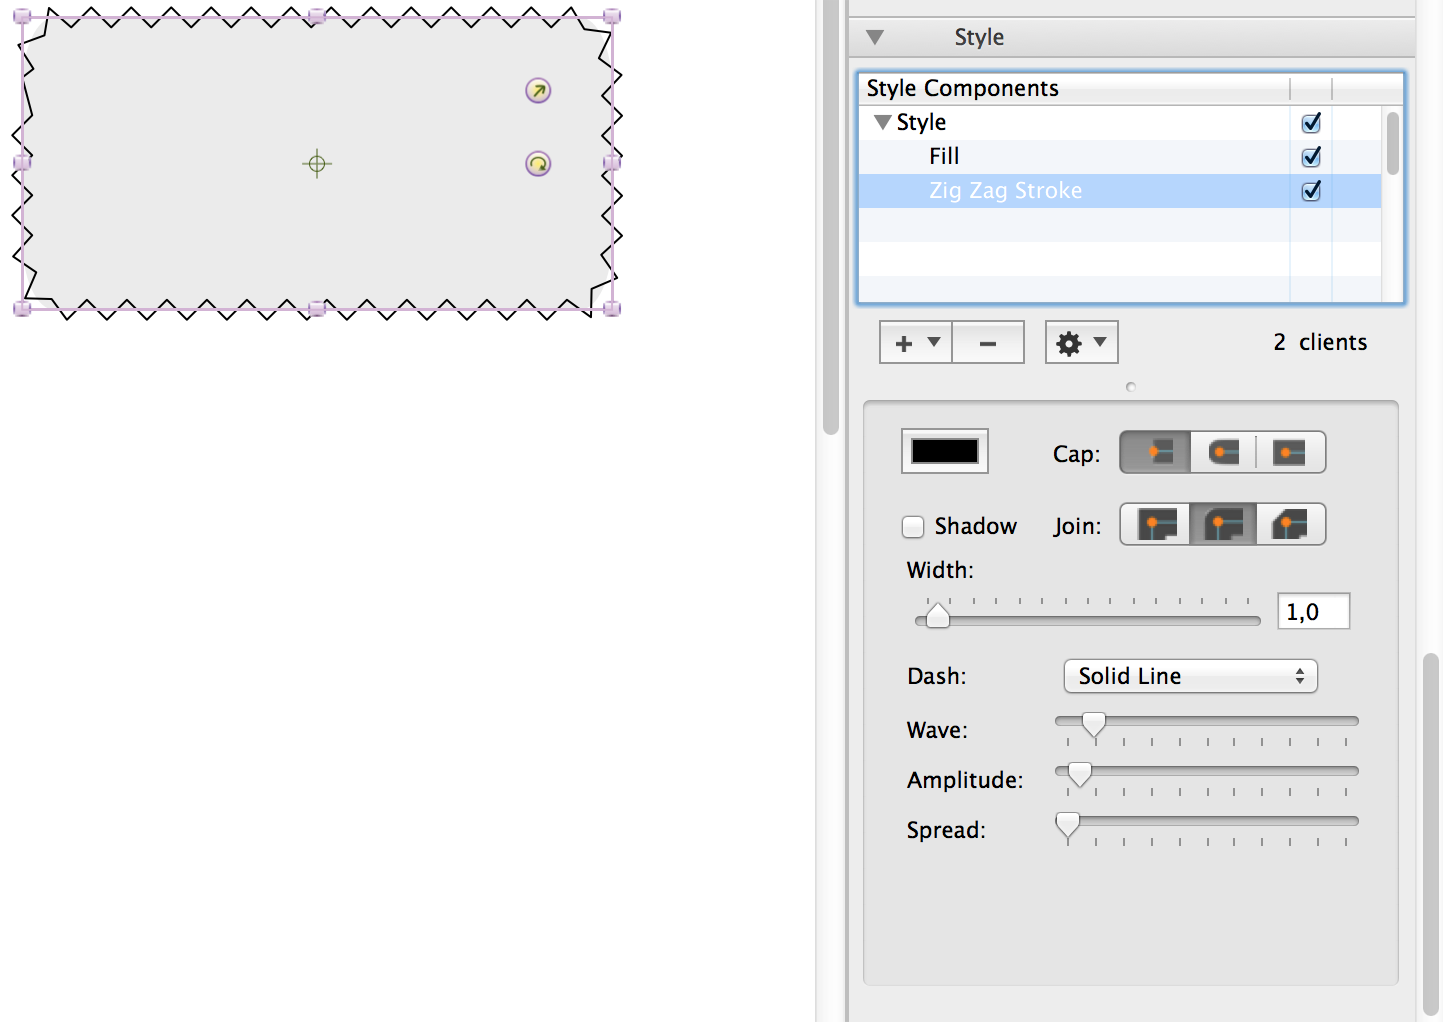
Zig Zag stroke component properties:

ZigZagStroke_large

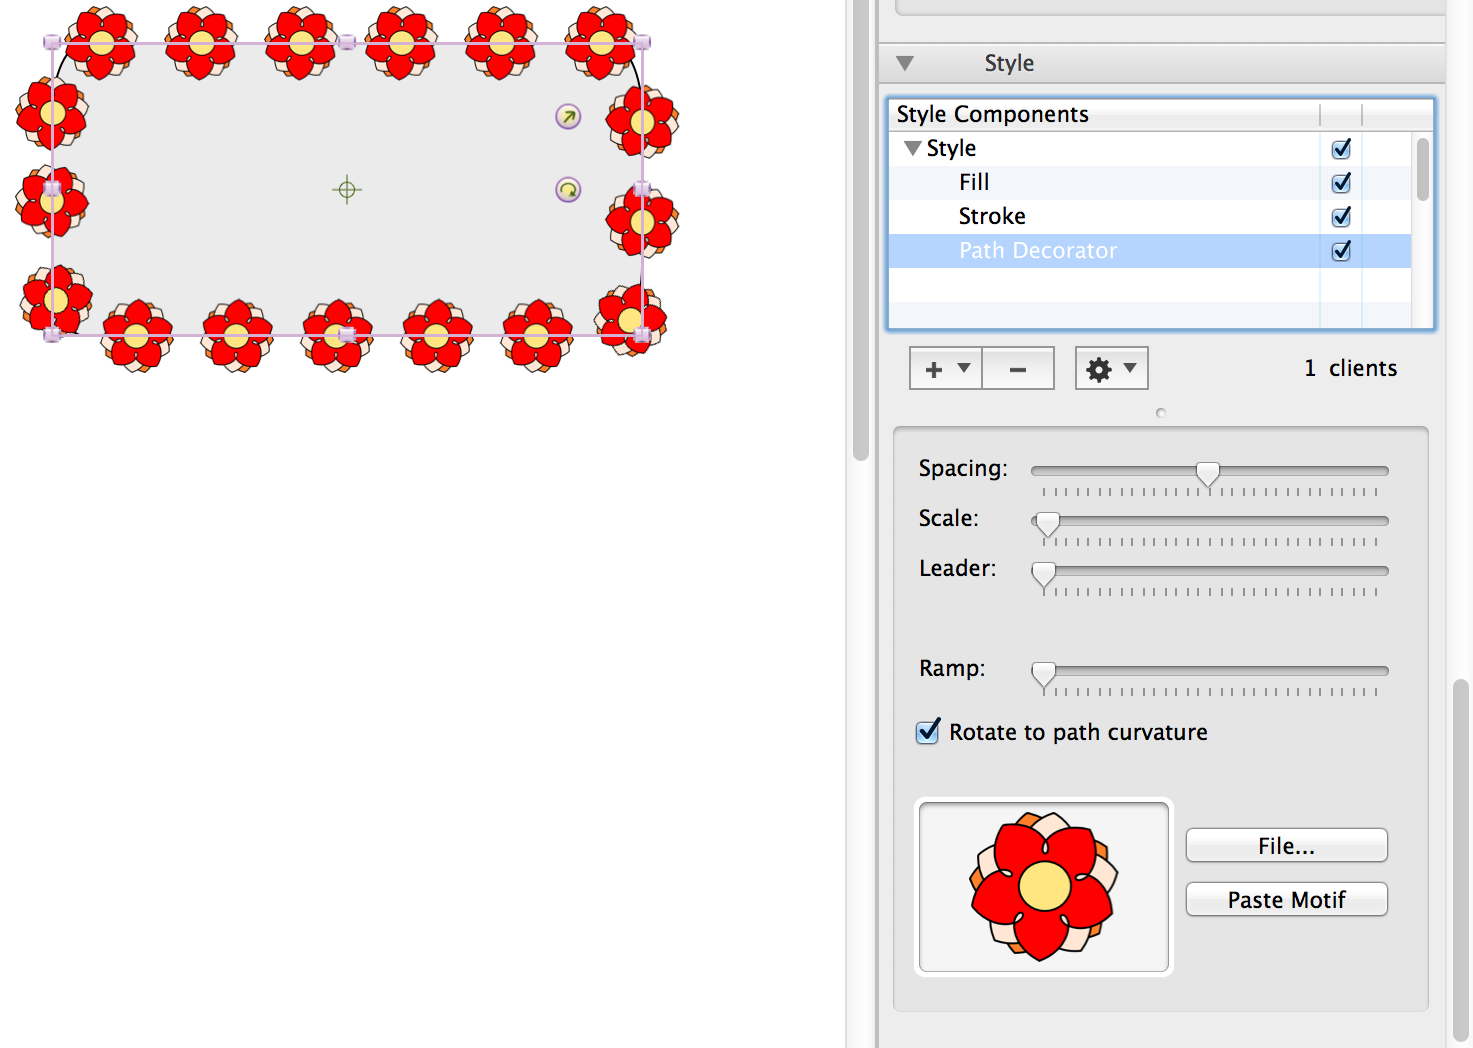
Path decorator stroke component properties:

PathDecoratorStroke_large

Fill pattern component properties: FillPattern_large

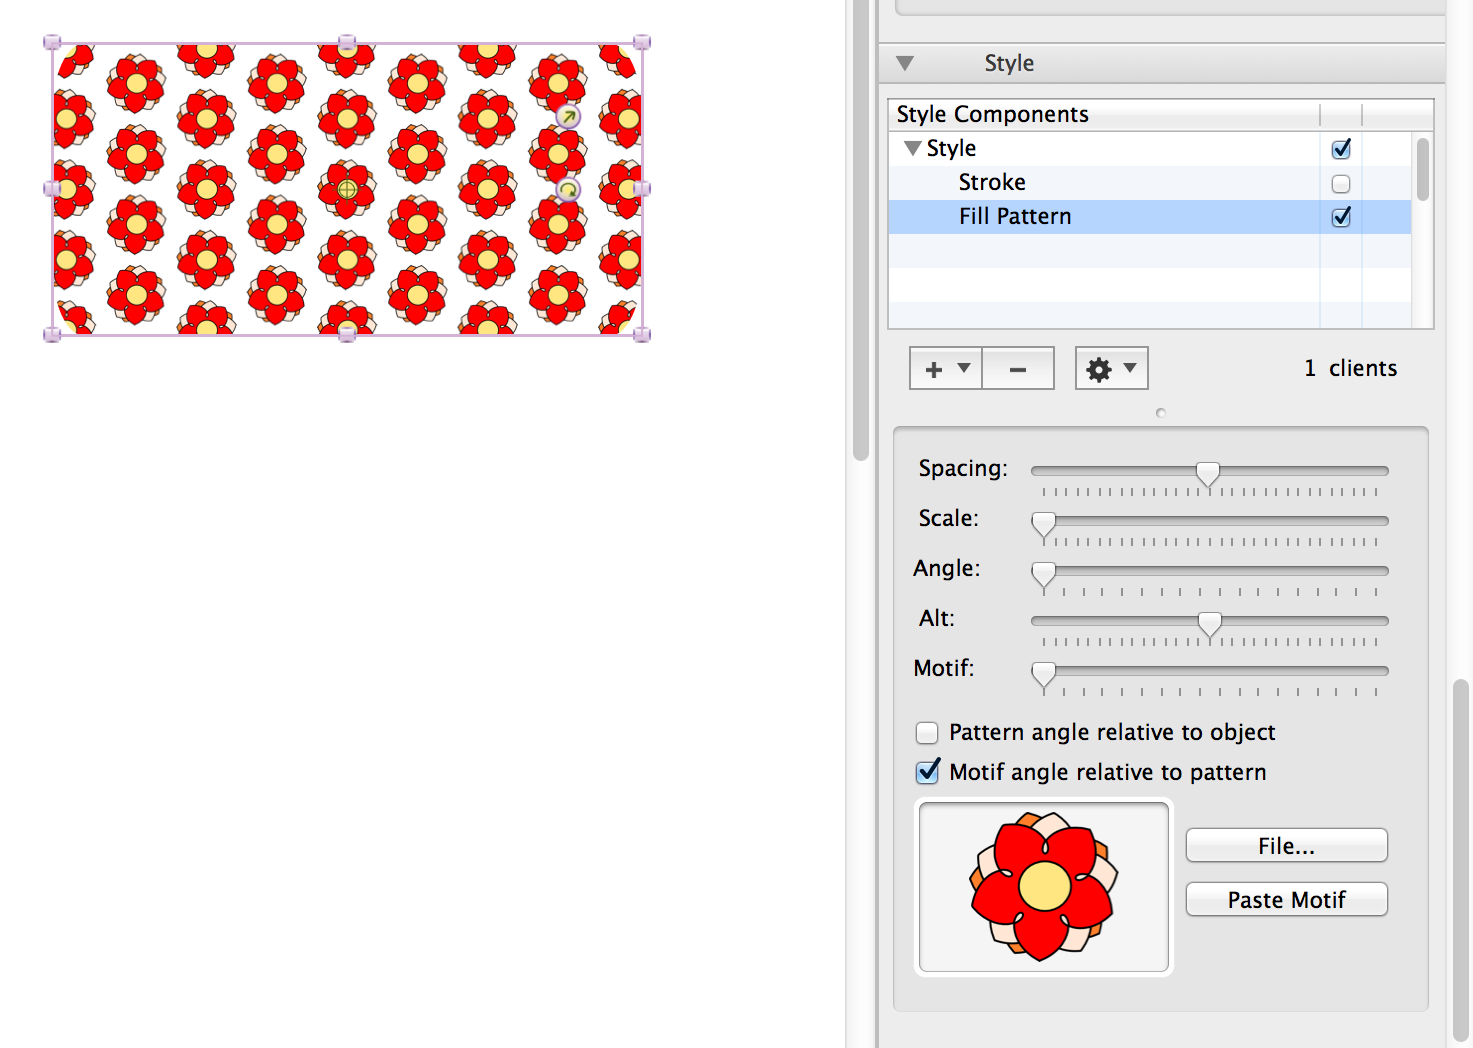
Zig Zag fill component properties:

ZigZagFill_large

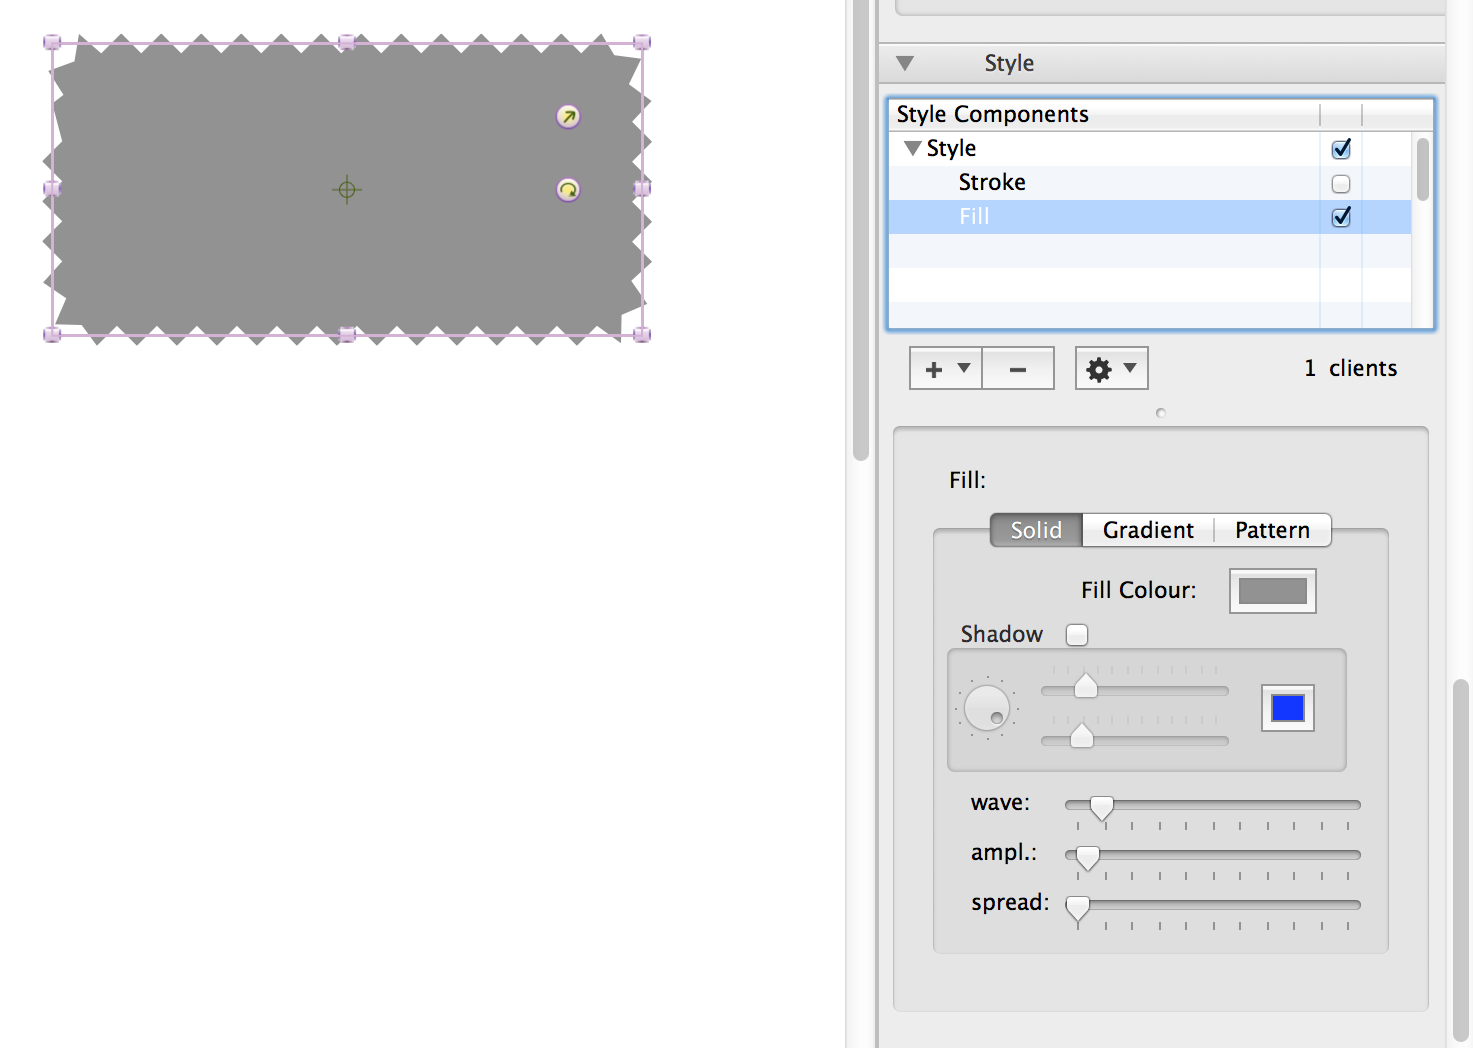
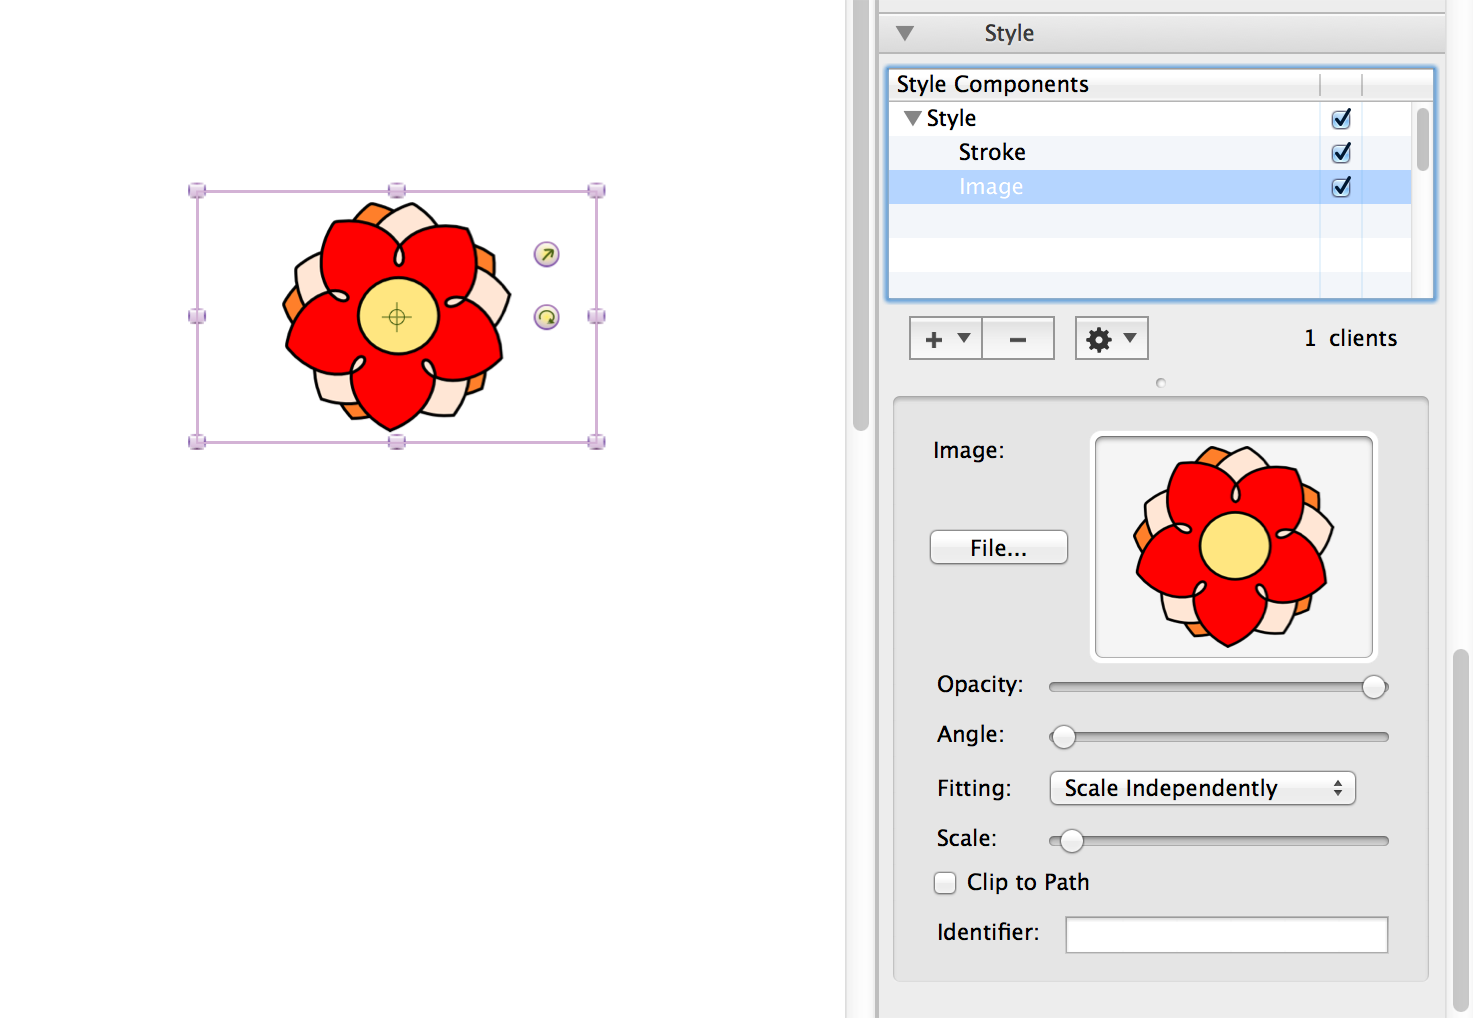
Image component properties:

Image_large

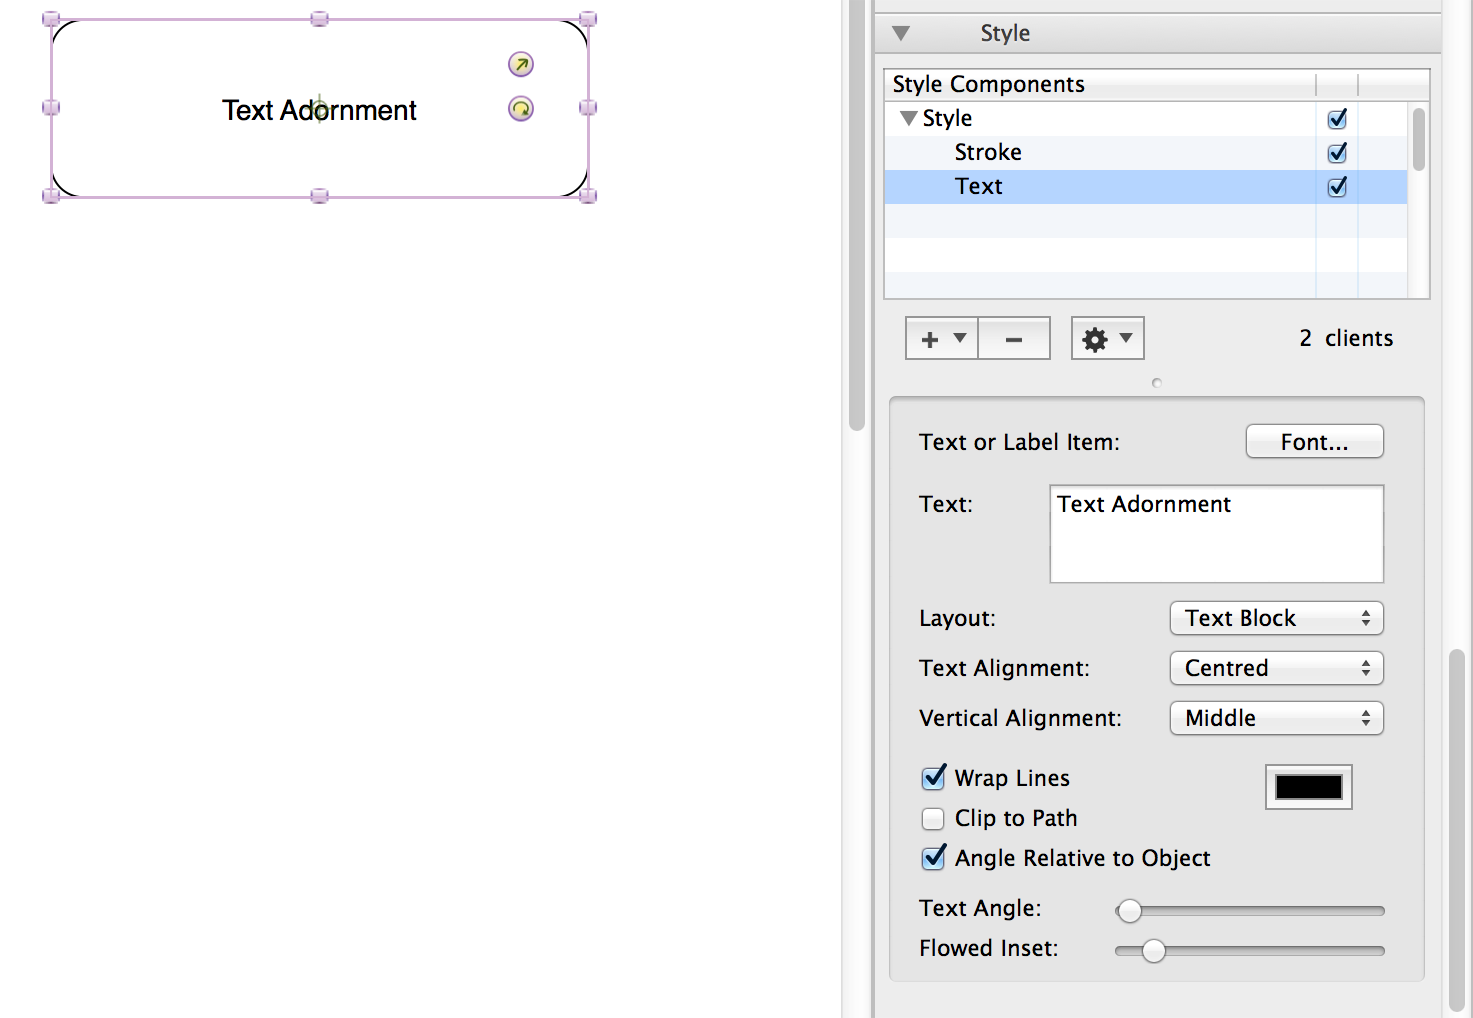
Text adornment component properties:

Text_large

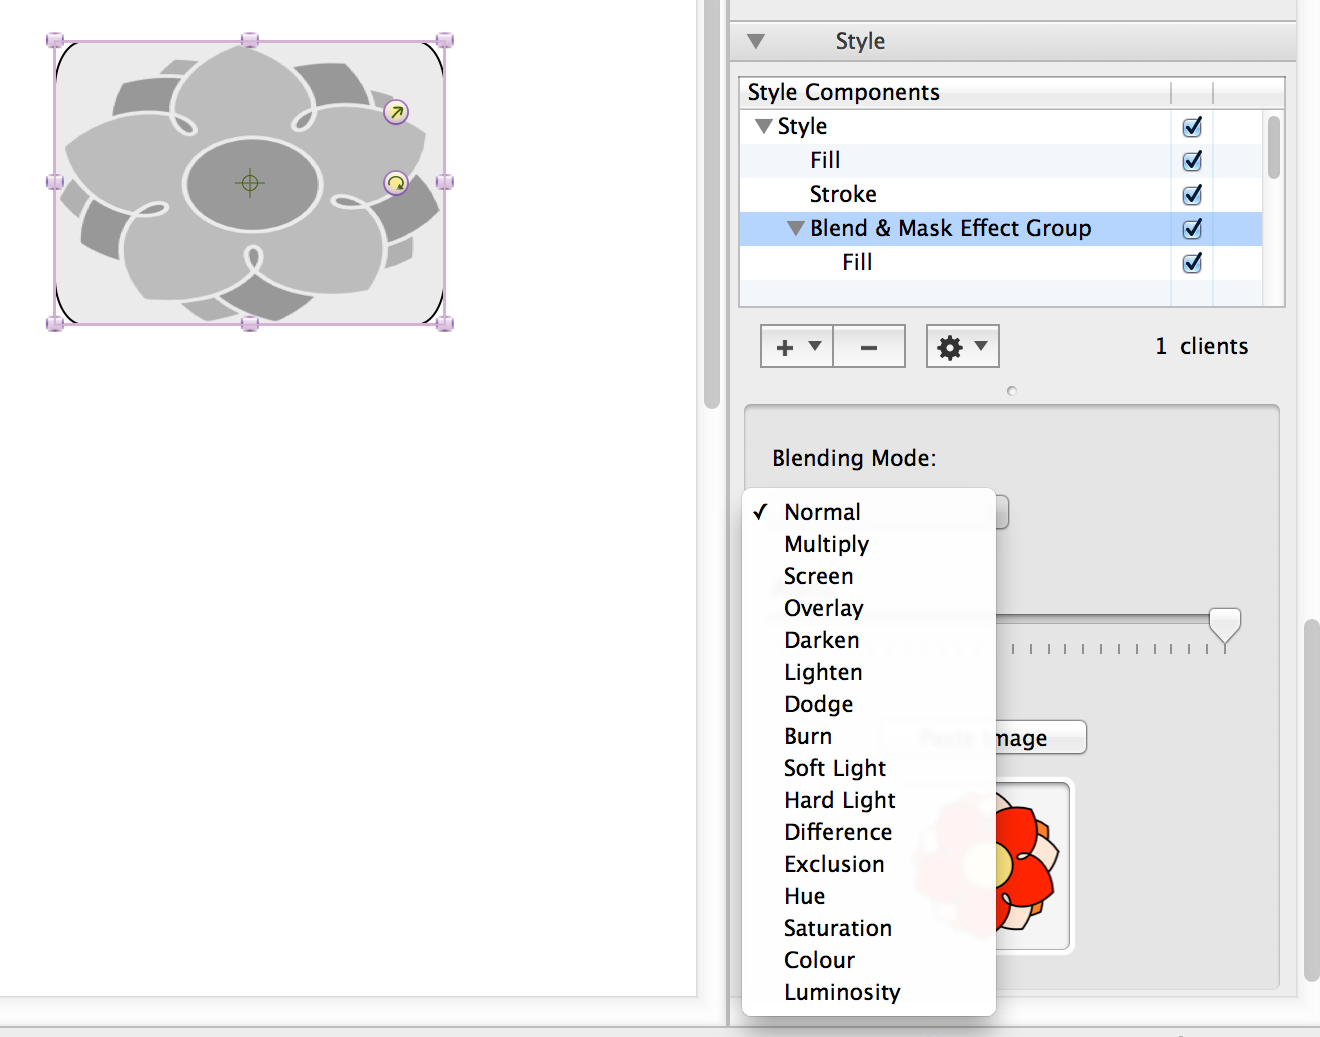
You can create Blend and Mask Effect group to apply different effects to style components:

BlendAndMask_large

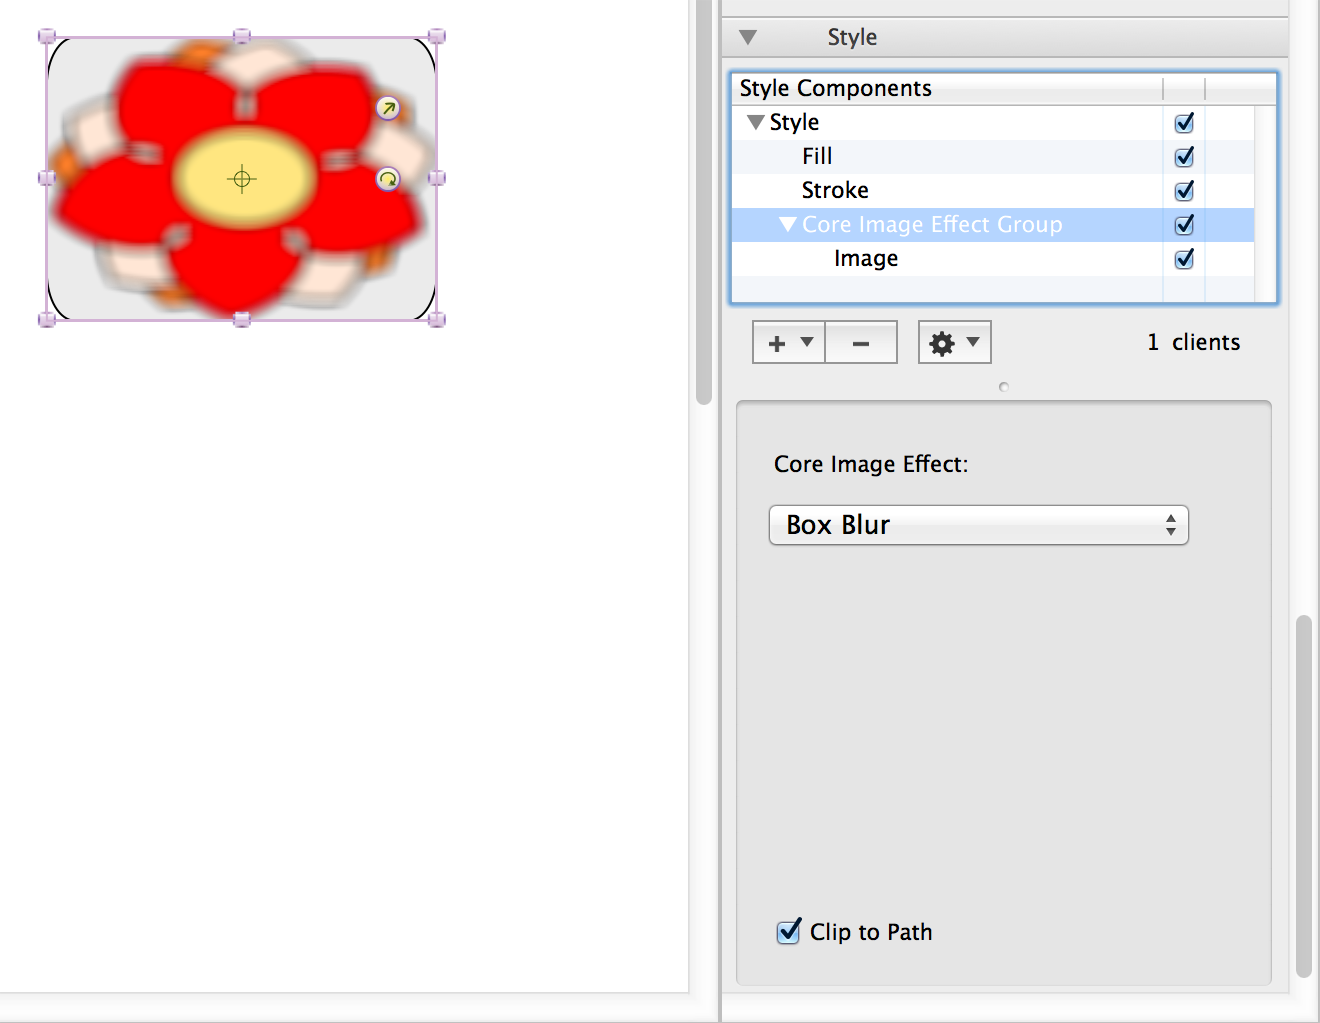
Also you can create Core Image Effect group:

CoreImage_large

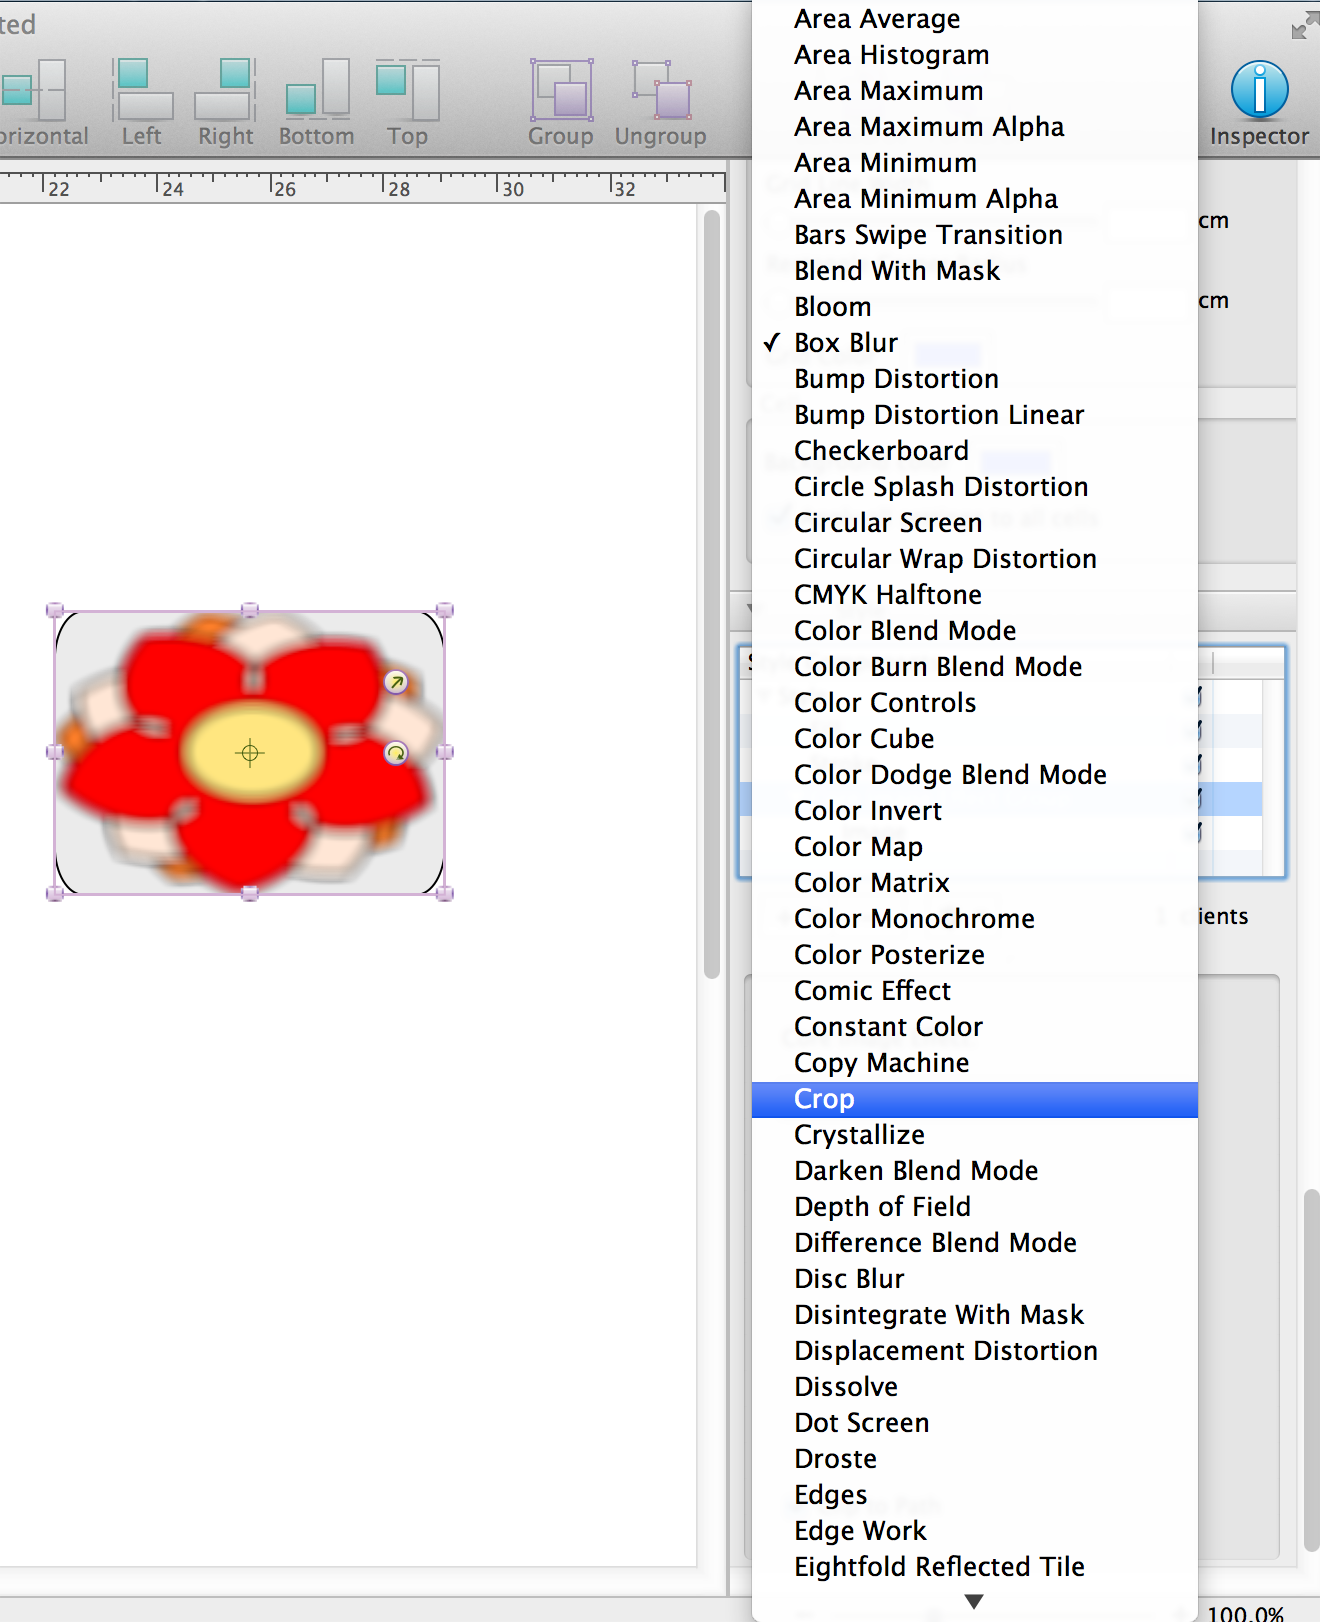
Core Image Effect group options:

CoreImageOptions_large

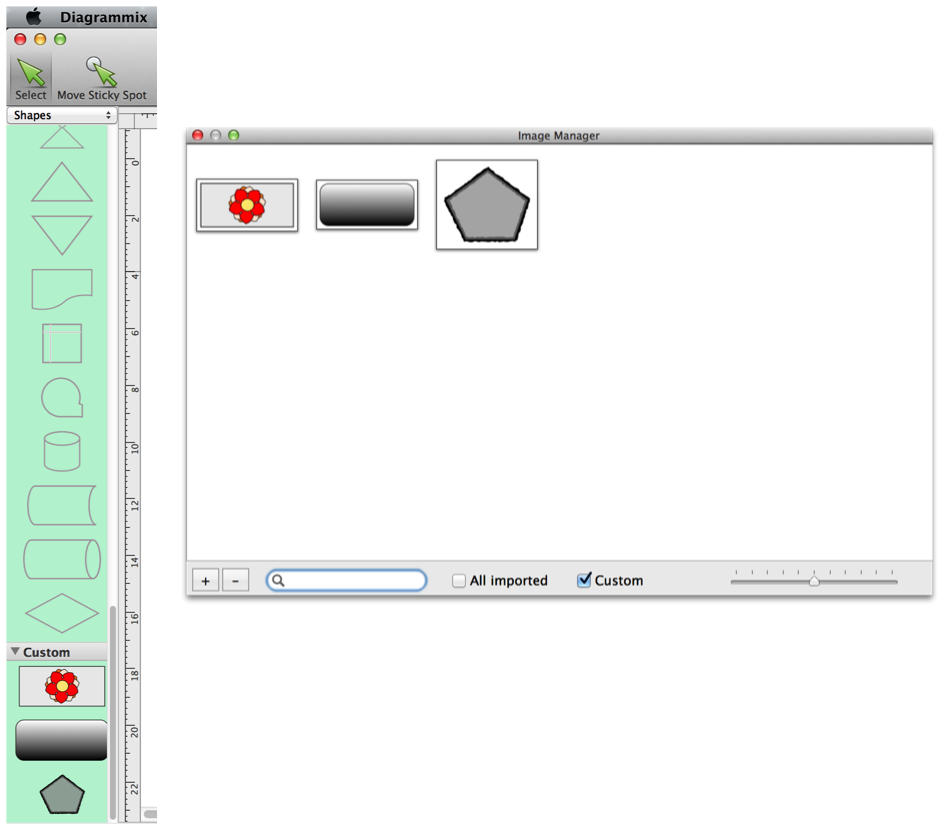
Created shapes is possible to save for later re-using. Send them to Image Manager or drag to Custom section of the shapes palette. They will be available across your documents. Double click an item in the Image Manager to give it a caption.

ImageManagerAndCustomSection_large

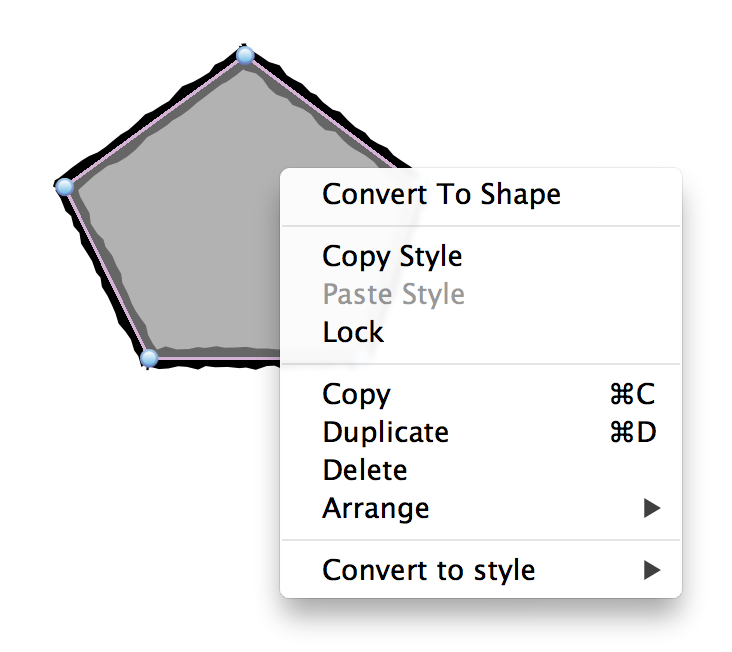
Created paths have to be converted to shapes before sending to palette.

ConvertToShape_large

You can save your styles in Style Library:

StyleLibrary_large


Add-ons

Vector Drawing Tools

Create your own shapes and lines with advanced vector drawing tools and style components. In fact this is a full featured vector drawing editor inside Diagrammix!
See details.

Smart Connectors

Smart Connectors provide advanced object-avoiding orthogonal and polyline connector routing.
See details.