Auto-Layout
Diagrammix3 includes a powerful auto-layout feature that automatically arranges your diagram elements for optimal readability. It offers several layout algorithms — from the classic Sugiyama hierarchical layout to tree, radial, circular, force-directed, and grid arrangements — so you can pick the one that best fits your diagram.
When to Use Auto-Layout
Auto-layout is helpful when:
- You've imported a diagram from Mermaid or another format
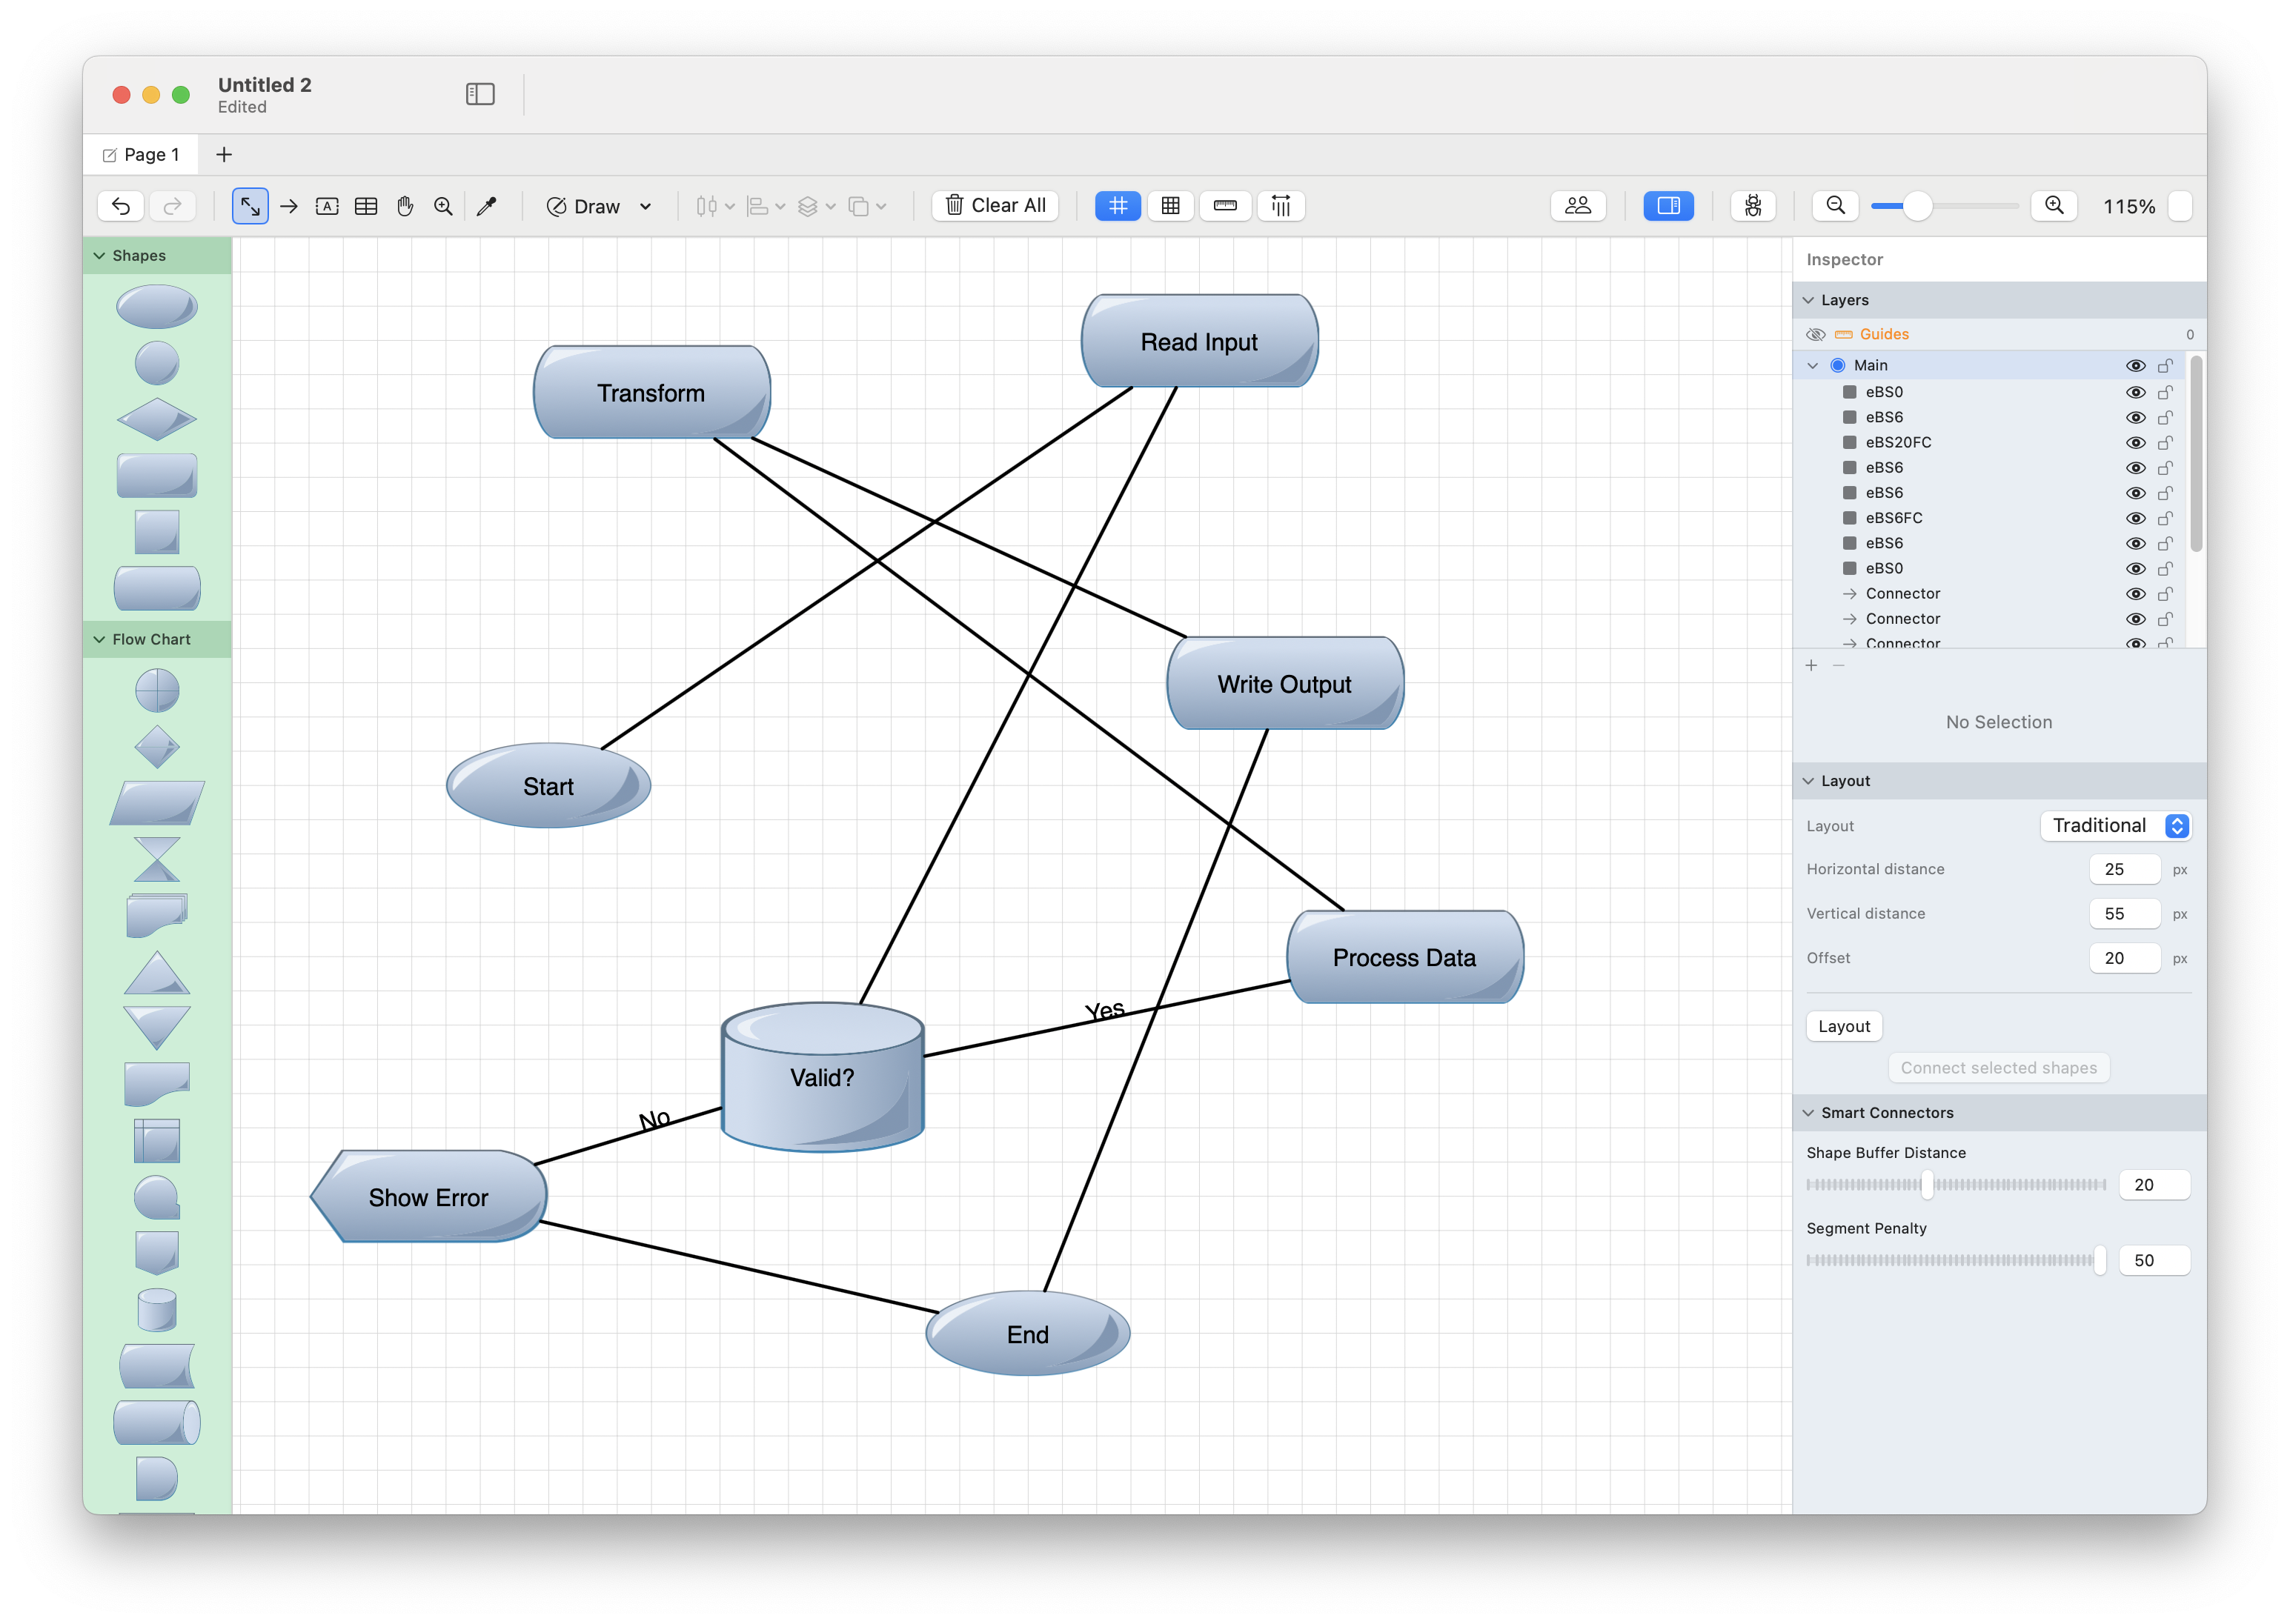
- Your diagram has become messy after many edits
- You want to quickly organize a large number of elements
- You're starting from a rough sketch and want a clean layout
Applying Auto-Layout
From the Menu
- Select the shapes you want to organize (or select all with Cmd+A)
- Go to Arrange → Auto-Layout
- The selected elements will be rearranged
From the Toolbar
Click the Auto-Layout button in the arrangement toolbar (grid icon).
Layout Algorithms
Beyond the classic hierarchical layout, Diagrammix offers a range of layout algorithms. Choose the one that matches the shape of your data:
| Algorithm | Best For |
|---|---|
| Hierarchical (Sugiyama) | Flowcharts, org charts, dependency graphs — layered, directed structures |
| Layered | Directed graphs where you want explicit control over the flow direction |
| Tree | Strict parent → child hierarchies |
| Radial | Hierarchies radiating from a central root |
| Circular | Nodes arranged around a ring; good for cycles and peer networks |
| Force-directed | Organic, physics-based spacing for general graphs |
| Organic | Natural, evenly spread layouts for dense graphs |
| Orthogonal | Compact layouts with right-angle routing |
| Grid / Pack | Tidy grid or packed arrangements of loosely related elements |
Tip: Try a few algorithms on the same selection —
Cmd+Zundoes each result instantly, so it's quick to compare.
Layout Direction
You can choose the direction of the layout hierarchy:
| Direction | Description | Best For |
|---|---|---|
| Top to Bottom | Root at top, leaves at bottom | Org charts, flowcharts |
| Bottom to Top | Root at bottom, leaves at top | Decision trees |
| Left to Right | Root at left, leaves at right | Process flows, timelines |
| Right to Left | Root at right, leaves at left | RTL diagrams |
Access direction options in Arrange → Auto-Layout → Direction.
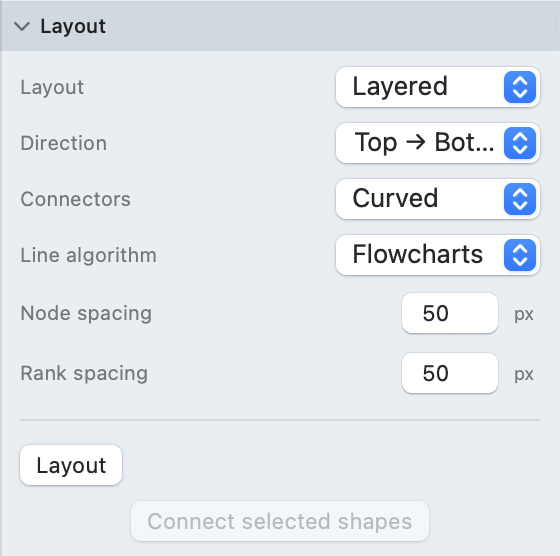
Layout Options
Spacing
Control the space between elements:
- Horizontal spacing: Distance between sibling nodes
- Vertical spacing: Distance between hierarchy levels
Adjust these in the layout options panel or Inspector.
Alignment
Choose how nodes at the same level are aligned:
- Center: Nodes centered within their level
- Left/Top: Nodes aligned to the start
- Right/Bottom: Nodes aligned to the end
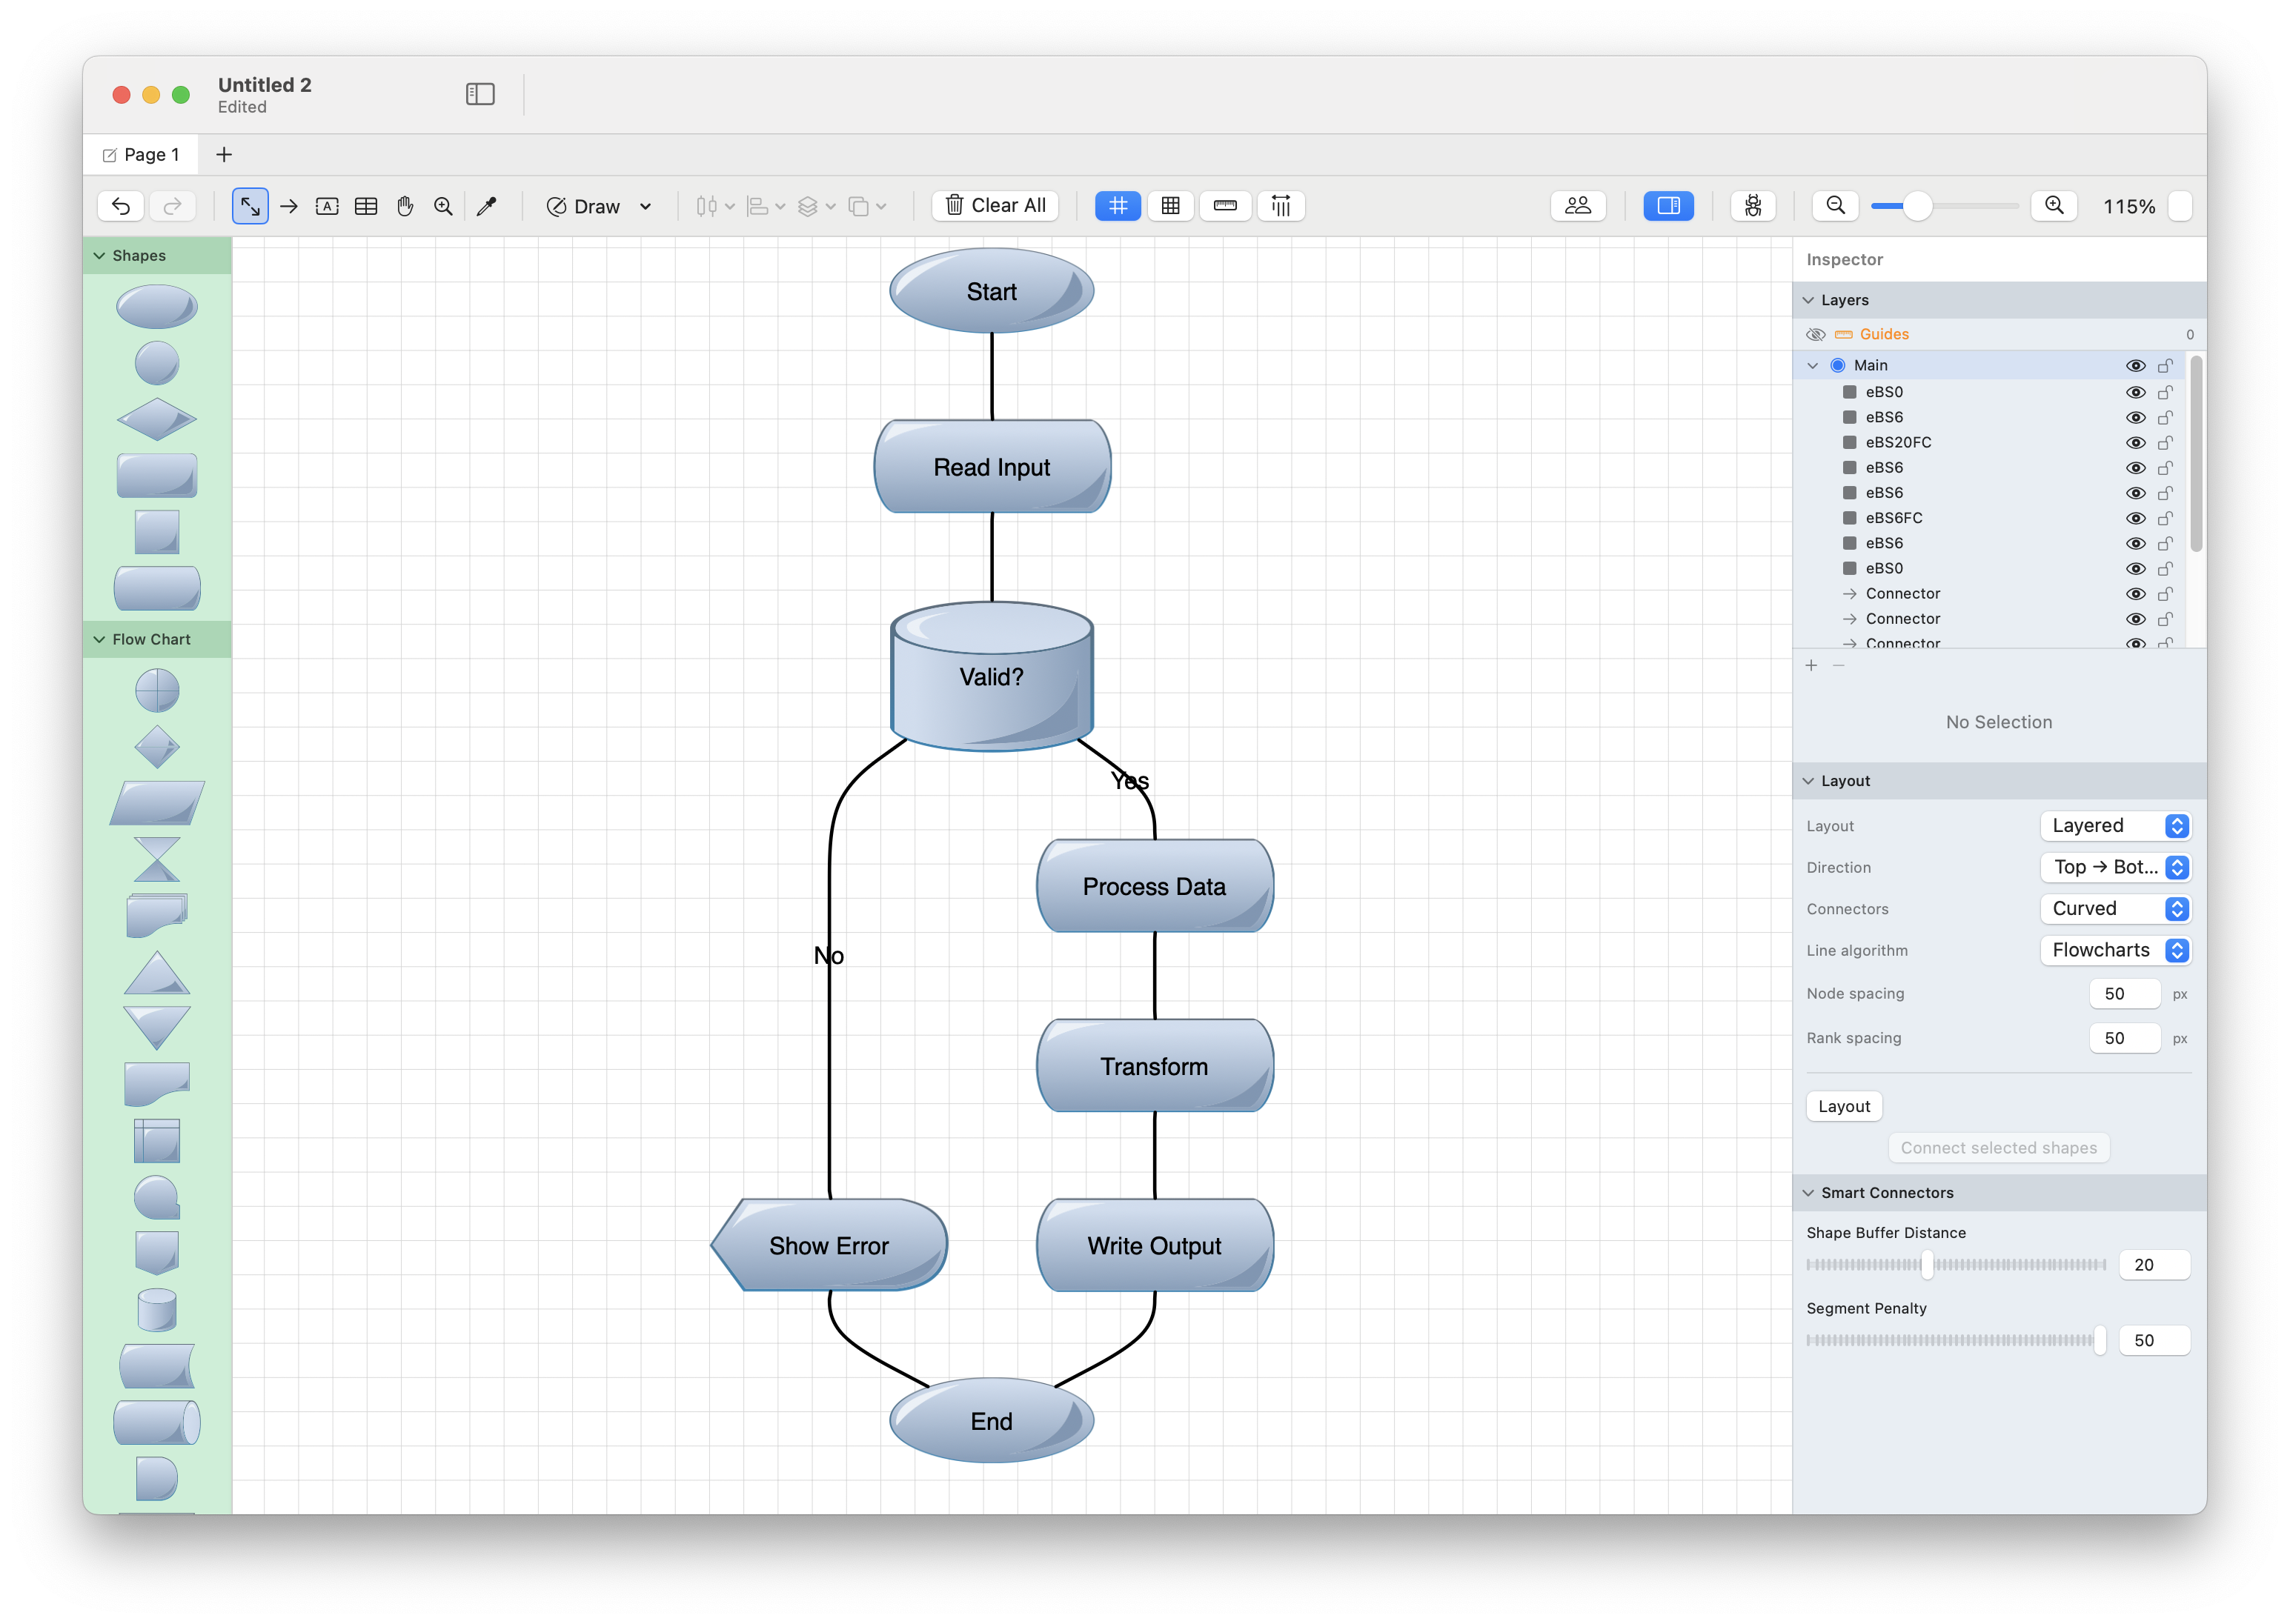
The Sugiyama Algorithm
The auto-layout uses the Sugiyama algorithm (also known as layered graph drawing), which:
- Assigns layers: Places nodes in hierarchical levels based on connections
- Reduces crossings: Minimizes edge crossings between layers
- Positions nodes: Places nodes to minimize edge lengths
- Routes edges: Creates clean connector paths
This algorithm is ideal for:
- Flowcharts
- Organization charts
- Dependency graphs
- UML class hierarchies
- State machines
Tips for Better Results
Before Running Auto-Layout
- Delete unnecessary connections: Extra edges increase complexity
- Group related items: Groups are treated as single nodes
- Consider direction: Think about which direction makes sense for your diagram
After Running Auto-Layout
- Fine-tune positions: Adjust individual elements as needed
- Check labels: Ensure labels are readable and not overlapping
- Adjust spacing: Increase spacing if elements feel cramped
Limitations
- Cyclic graphs: Diagrams with circular references may not layout perfectly
- Dense graphs: Very dense diagrams may still have some edge crossings
- Custom positions: Layout will override any manual positioning
- Aspect ratio: The algorithm doesn't consider canvas aspect ratio
Undo
If you don't like the result, press Cmd+Z to undo the layout and restore the previous positions.